
Here's a pretty and modest neckline fix for a fancy party dress or prom dress that shows a little too much cleavage. I think it's WAAAAY better than throwing a camisole underneath. Come see how I fixed this dress and what I learned along the way!

Create a Raised Neckline in a Prom Dress
My friend came to me and asked if I had any ideas on how to fix this pretty prom dress that was sitting a bit too low in the neck for her daughter. Rather than wear a camisole underneath or attaching some fabric across the "V", we came up with a better solution. She picked up some satin fabric that matched the waistband of the dress from Joann's Casa collection. I used a couple of folded pieces of satin to bring up the neckline.

Have you ever used this type of satin? For this fix I wanted to get a nice crisp crease in the fold so the inserted pieces would lay flat. This fabric is very hard to get a nice crisp crease on the fold if you are folding it perpendicular to the selvedge edge.
However if the fold is running parallel to the selvedge edge it makes a beautiful crisp fold. I suggest buying enough fabric to cut the length parallel to the selvedge edge. I needed a 14'' strip but only had a 1/4 yard of fabric which is 9" wide.
Modest Neckline Fix for a Party Dress
1. Cut a rectangle of satin fabric about 5'' x 14'' ish.
Measure from the shoulder seam to the chest and add a couple of inches to get the length you need. The width will depend on how wide you want the fabric to show. I cut mine down a little narrower after I folded it. I started with it bigger than needed just in case.
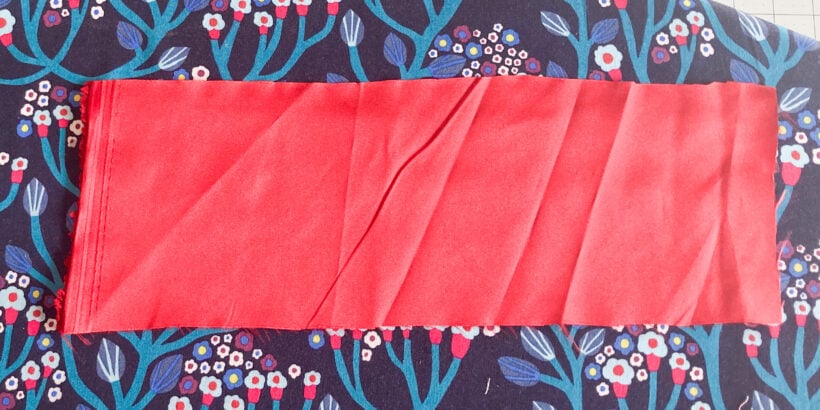
2. Fold the rectangle in half lengthwise with the wrong sides together and press.

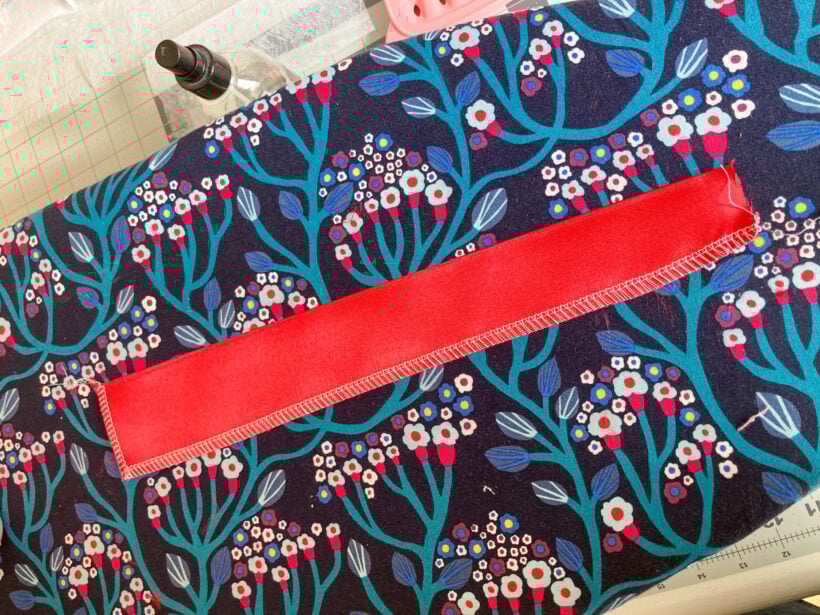
3. Open the fold and place a strip of fusible webbing on one side. Fold again and press.
This may not be necessary if you are able to get a good crease in the fabric. Mine would not press flat because I cut it the wrong direction. I improvised an added this fusible web to make it stay down. It worked really well.

Here is the fusible webbing I used.

4. Place the folded piece just inside the neckline on one side to figure out where you want to place it.
I positioned mine so that it tapers from 1'' away from the "V" to just peeking out from the shoulder seam


5. Finish the raw edges of the strip so they don't fray.
I used a serger, a zig zag stitch works as well.
6. Sew the strip of fabric to neckline, using a needle and thread.
Keep the stitches just underneath the edge so they can't be seen. The fusible web inside the satin was very hard to sew through so this process was a little tedious.

7. Repeat for the other side.

And there you have it! Hope this helps you out. Drop me a comment if you use these tips! Tag me @Bluesusanmakes on Instagram and Facebook! I'd love to see the dress you fix by raising a neckline using this technique!
Happy Sewing!
See more clothing I've made on my APPAREL PAGE

