I have another fun art lesson from Grandma for you this week. Adults and teens will want to get in on this one as well. We explored the art of Metal Tooling and Embossing. It's interesting to use your hands to manipulate materials. This is a good one that even my teen boys had fun with. Come see what we learned.
Metal Tooling and Embossing Art Project
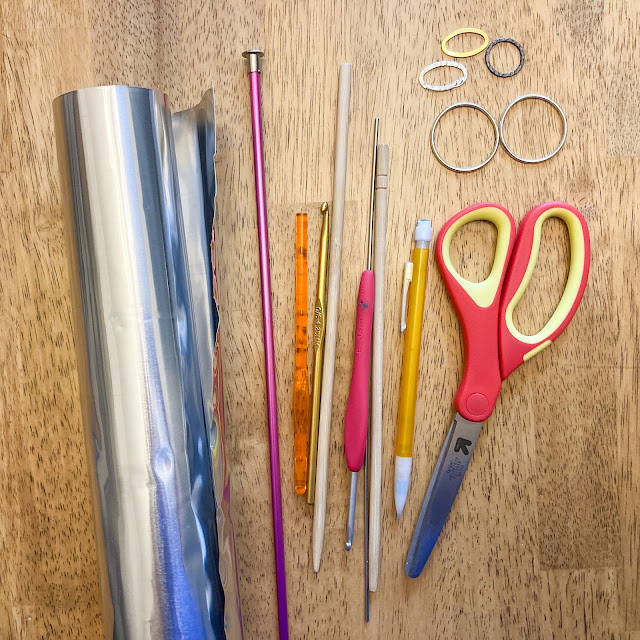
For our Metal Tooling Project You'll need:
- Aluminum tooling foil - we ordered this kind from Amazon (affiliate link)
- Various dull tipped objects such as pens, pencils, knitting needles, skewers. rings, etc.
- A towel to work on
- Craft scissors to cut the foil
- Printed image to trace (optional)
- tape for holding printed picture in place
- Beeswax for finishing (optional)
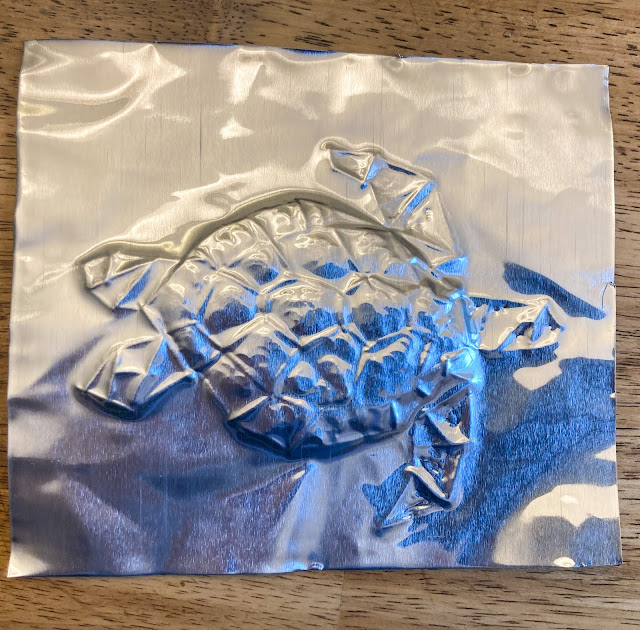
Any clip art image will work. Check out Grandma's Pinterest page dedicated to Metal art for ideas. We like animals so we looked up a geometric turtle and a geometric bear.
Setting up the project
Gather all your items. Cut out a practice piece or two from the foil using the craft scissors. Lay a towel on the table and place the foil on top of it. The edges of the foil are sharp so be careful. Wrap the edges of the foil with painters tape for added safety if you want to.
First we practice
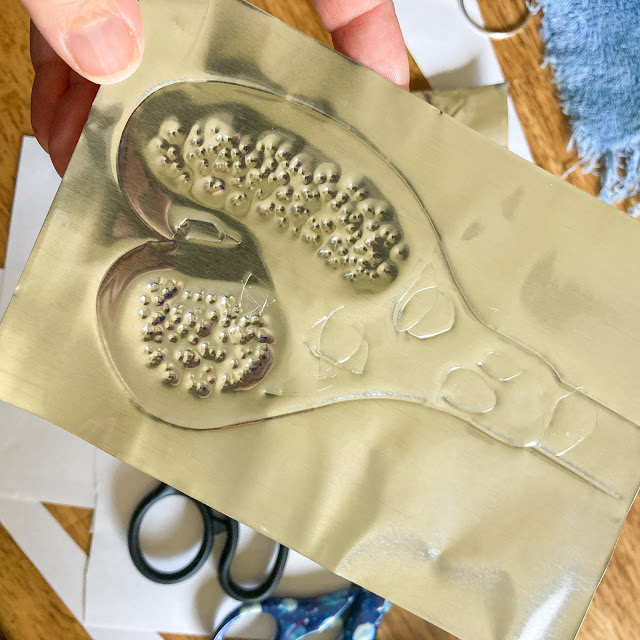
For our art lesson grandma had us begin by experimenting with the different tools we gathered to see how they would work on the foil. Press gently and hard for a different effect. The towel surface lets you push down and stretch out the foil. When you flip it over you can see how it is raised or embossed where you pressed.
You can work on one side and make an outline of your picture and then flip it to the other side and tool in the center of your design to create an embossing effect. This is especially fun to do with a key ring or the inside of a scissor handle. The real fun happens in the experimenting. There is no wrong way practice.
Trace a picture onto the foil
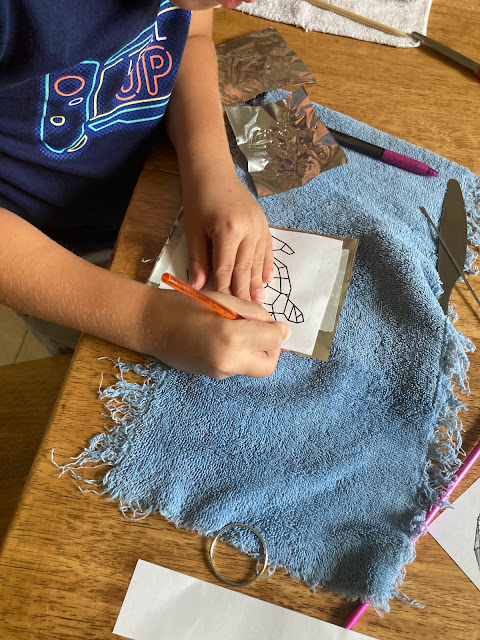
When you feel like you've got the hang of it, grab a fresh piece of foil and an image to trace. Any clip art image will work. Tape the image onto the new piece of foil and use a tool to press and trace around the edges. using a pen or pencil makes it easier to see where you've traced.
Remove the paper and add details
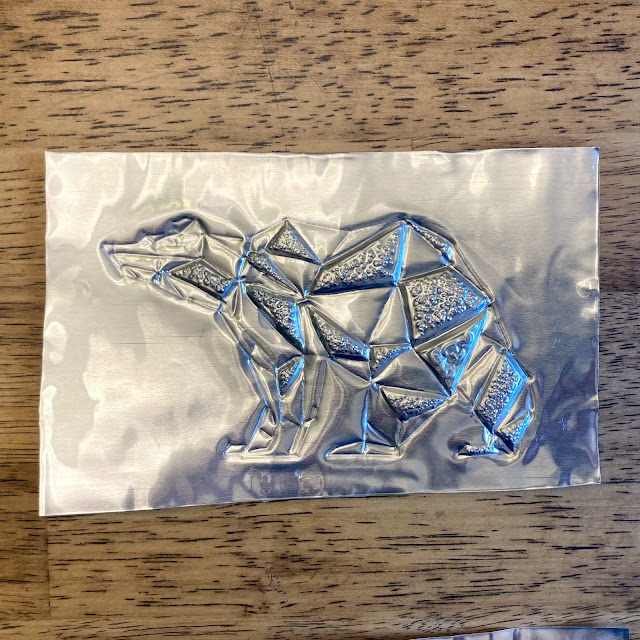
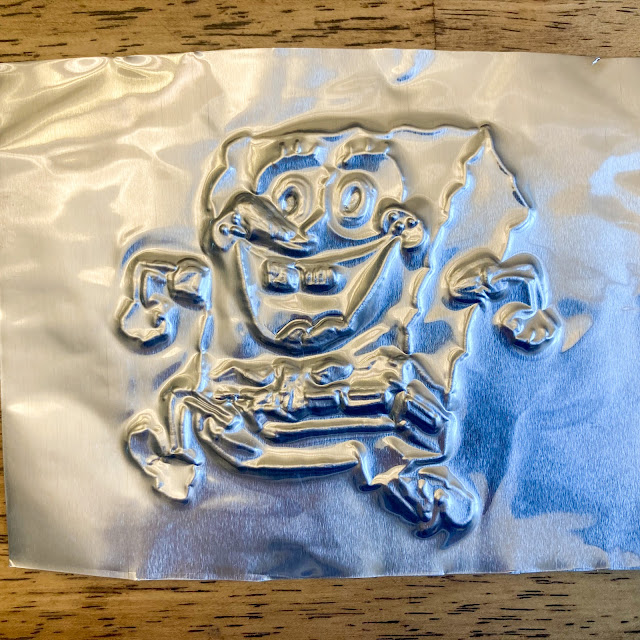
Now's your chance to make it look cool using the techniques you learned on your practice piece. Again, there is no pressure for it to look great when finished. Just the act of making is fun even if it doesn't look like you imagined it would. Here are some of our finishes.
What to do with your finished piece of art
Now that your piece is complete you can...
- put it in a frame
- decorate the top of box or little trunk like the unfinished kind you can get at the craft store.
- Cut the edges nicely and mount it to a piece of black cardstock
- wrap around the edges of a frame
- Put it in a scrap book
- Turn it into a card to give away
Check out Grandma's pinterest page for more finishing ideas.
If you are putting your metal picture on a useable item like a box top and you don't want your embossing to get pushed in you can fill the back of it with wax. Turn the picture over and poor melted bees wax or candle wax on the backside. Once it's cool the wax will support the embosses areas and they will not cave in when pressed.
I hope you enjoyed this fun art project. Now you've learned something else cool you can do with your free time.
Happy Making!
Find more Art Lessons with Grandma



No comments:
Post a Comment