Hello Sewing Friends! I'm here to share a little tutorial for a fun Spring Bunny Bunting to hang up for the Easter season. I feel like something is missing in my holiday decor if I don't have some sort of banner hanging up. This one is super easy and has hardly any sewing at all. Get together with some friends and make one this week!
P.S. Do you like that pretty poster? I downloaded that at Caravan Shoppe and printed it as a 4' x 3' "blueprint" print at Staples. Caravan Shoppe is my favorite place to get cute holiday printables.
How to make a Spring Bunny Bunting
For this project you'll need
- 1/3 yard medium weight fabric for the bunting flags. I used a light canvas with a wide weave to get that frayed edge. Burlap works great too! But you could really use any woven fabric that isn't see through. The edges will be left raw and unhemmed.
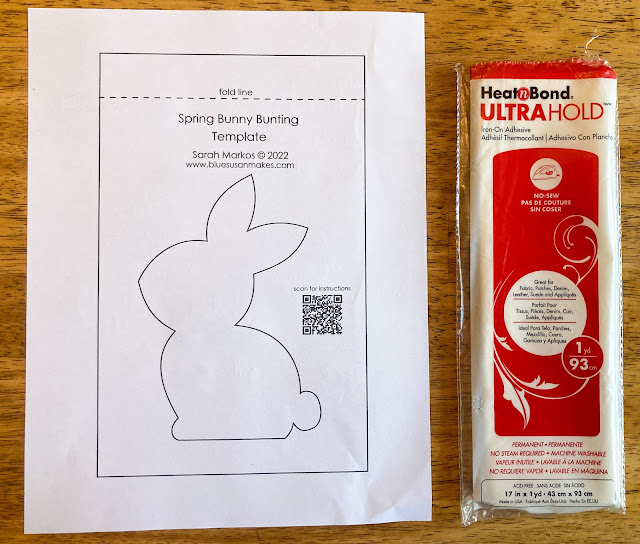
- Heat 'n Bond Ultrahold or another paper backed iron on fabric adhesive
- Spring colored fabric scraps at least 4 1/2'' x 6 1/2''
- A Bunny shape to trace. Search Bunny clip art. or download and print the template I made.
- Jute twine or yarn.
- safety pin
Make the flags for the bunting
1. Cut each flag piece 5" x 9 1/2" from the main fabric You can use the template or a Rotary cutter, ruler, and mat. I made 5 flags but you can make as many as you'd like. We won't be hemming these edges so pull the loose threads from each side to make them a little frayed looking
2. Fold one short side over 1'' toward the wrong side of the fabric. Press and pin in place. Repeat for each flag.
3. Stitch along the edge to form a casing. Repeat for each flag
Prepare the Bunnies
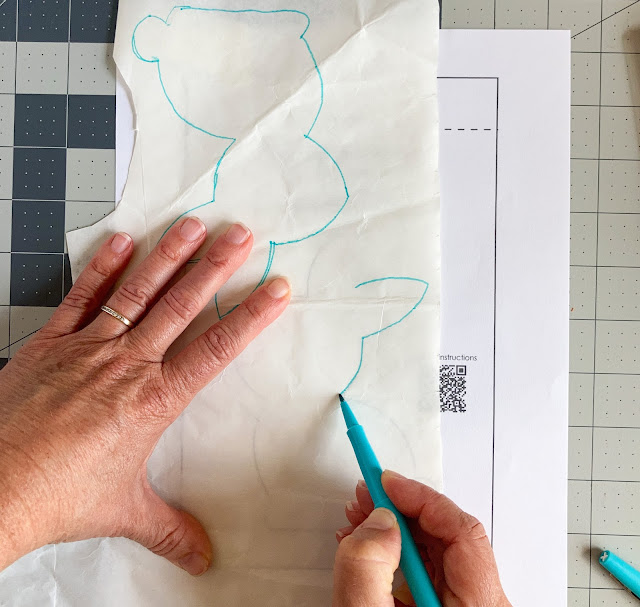
4. Trace each Bunny shape onto the paper side of the the fabric adhesive. Remember the finished bunny will be a reverse of what you are tracing if that matters to you. Leave about 3/8’’ space between each shape.
5. Roughly cut around each Bunny shape leaving space around the edges. Don't cut on the line.
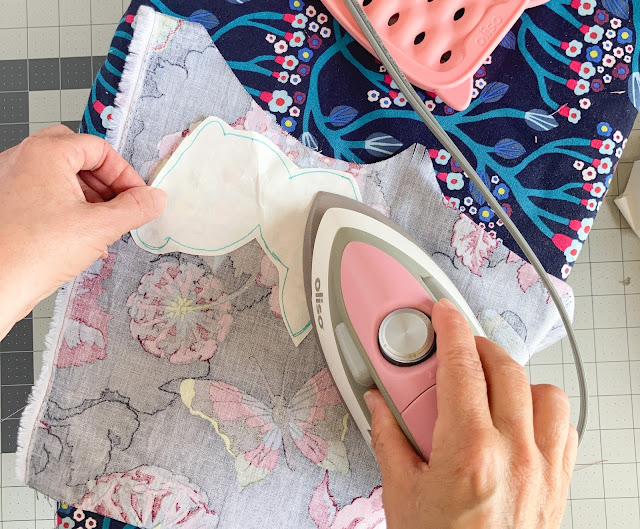
6. Using an iron, fuse each Bunny shape to the wrong side of a fabric scrap according to the manufacturer’s instructions. I used a medium hot iron and placed it directly on top of the paper, moving it around every few seconds but it's best to check the instructions that come with the product you have.
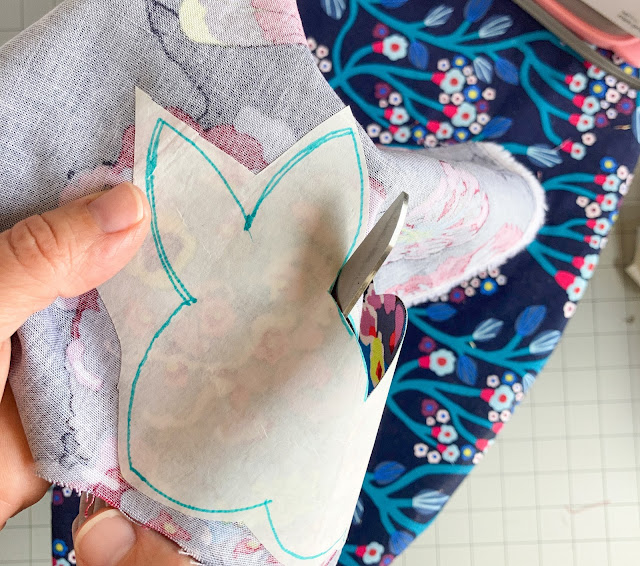
7. Carefully cut the fused shape out, cutting right on the line this time.
7. Carefully cut the fused shape out, cutting right on the line this time.
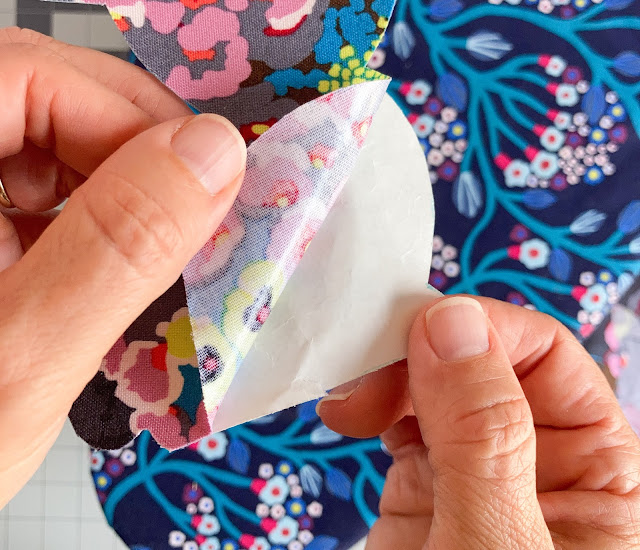
8. Peel the paper side off of the bunny shape. The glue should stay on the fabric. Feel free to iron the paper a little longer if it doesn't. You'll get the hang of it.
9. Position the bunny shape on fabric flag about 3/4 inch above the bottom.
10. Fuse the bunny shape to the flag using an iron. You are welcome to stitch around each shape but it is not necessary unless you want to for the look. Repeat for each bunny.
11. Lay out your bunnies with a little space in between and measure out your desired length of twine. Braiding and tying knots uses up some extra length so add 6-7 inches to the measurement. I cut mine at about 5 1/2 feet. Cut 3 pieces at this length. You can use one strand and call it good but I like it to look a little thicker.
12.Tie a knot in one end and pin it to the edge of the ironing board or an old pillow. Wind the extra length of each string around your fingers into a little ball and keep it in place with a rubber band. This keeps the extra length from getting tangled as you braid. Braid it loosely and tie it off with another know at the end.
13. Use a safety pin or a bodkin to thread the braided through each casing.
One more tip!
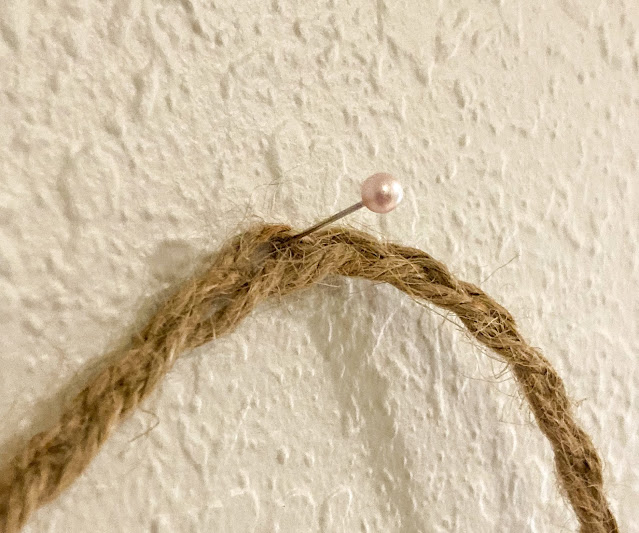
I always use an old sewing pin to hang my banners and buntings. You can push them in with steady fingers and when you pull them out they usually leave such a small hole that you will never find it again. Sewing notions to the rescue again!
So, what do you think? Pretty easy, right!? If you make a Spring Bunny Bunting I'd love to see it!! Tag me @bluesusanmakes, #springbunnybunting, #bluesusanmakes. Connect with me on Facebook or Instagram and find more sewing inspiration!
Happy Sewing
More Easter tutorials you may like...
Little Bunny Embroidery - make a Happy Easter wall hanging
Monster Babies - a cute little stuffie to add to your easter basket
Mer's Easter Dress - McCall's M5798 pattern review

-3.jpg)

.jpg)

-2.jpg)
.jpg)
.jpg)
No comments:
Post a Comment