
Meet my stuffed Skeleton friend Mr. Bones! Look how BIG he is! I’m so happy to be sewing this Mr. Bones Skeleton panel up and giving myself a big high five to be finishing it in time to add to my Halloween decor. He’s either going to sit on my bench for the season or be a movie buddy for Tom. Lol!
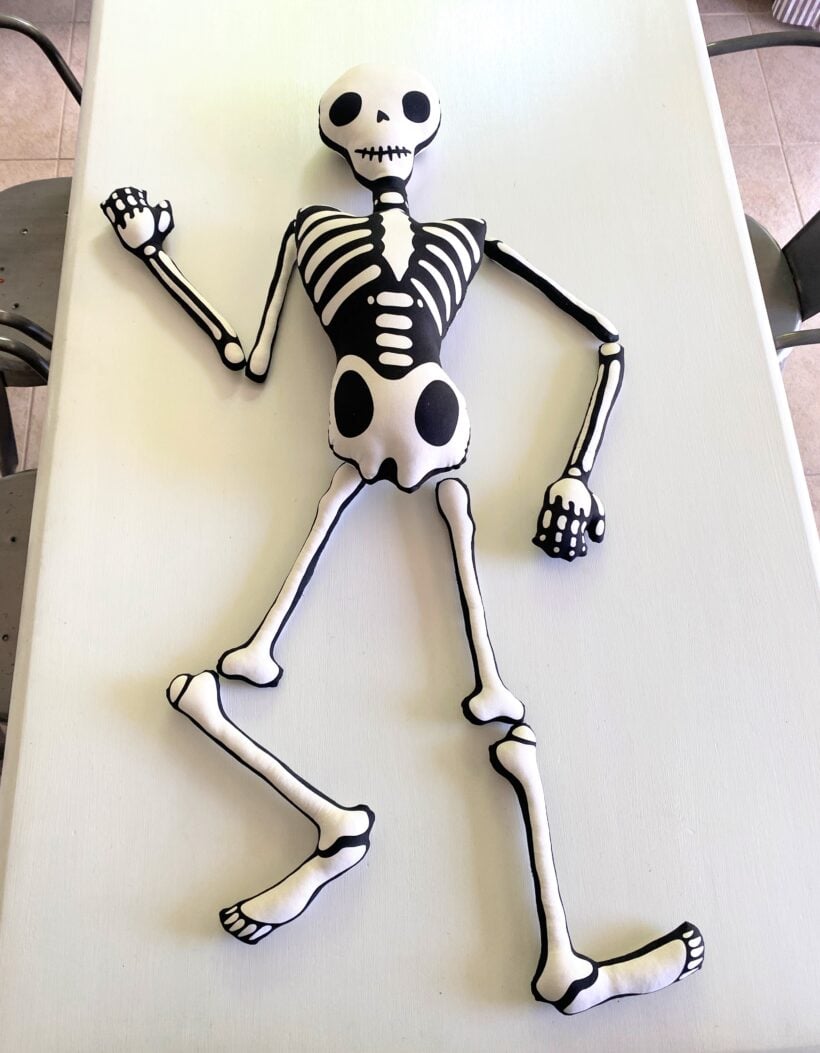
This fun panel is designed My Minds Eye for Riley Blake Designs! I picked it up from my local quilt shop, but if you search for it online you can find it a variety of online quilt shops. Amazon sells the Mr. Bones Skeleton panel too!

This fabric panel was so easy and fun to sew up. It would be a great panel to work on together with a kid who’s learning to sew. They could practice cutting, sewing, stuffing, and hand sewing too!
5 Tips for sewing the Mr. Bones Skeleton
I have a video showing a little bit about how he's made over on Instagram HERE.
There is a QR code on the panel that takes you to the sewing instructions for the project, but I thought I'd share my own tips in case you are making one too! Scroll down past the video to see my 5 tips!
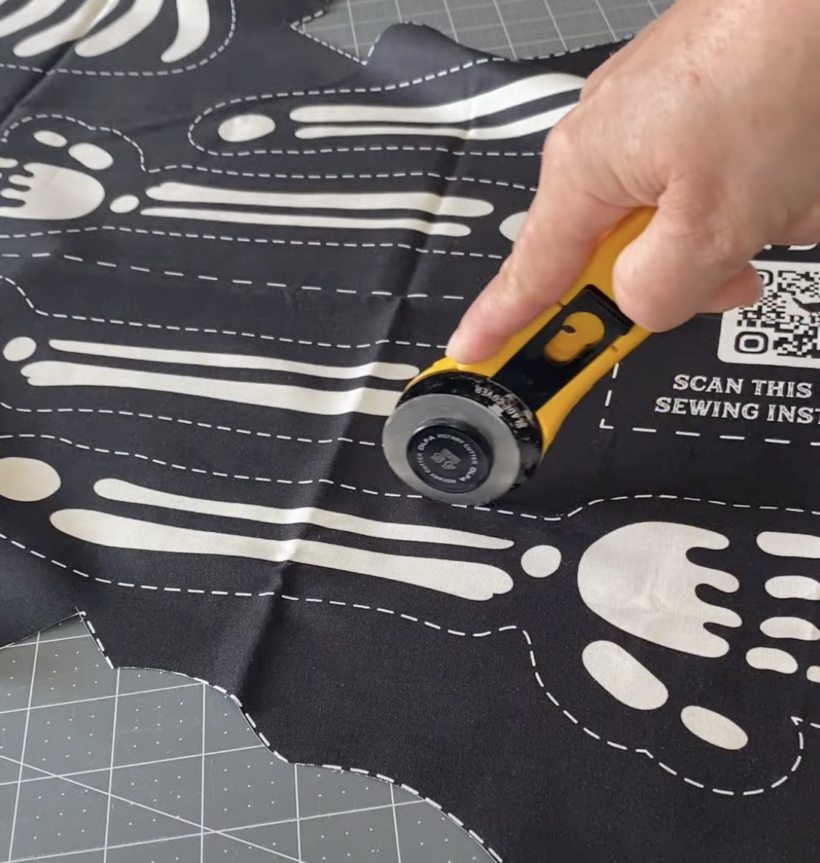
1. Cut with a rotary cutter and a cutting mat
The dotted lines on this fabric panel make it super easy to cut out. I was worried at first that if I cut all the pieces out separately (instead of 2 at a time) they would not line up very well when I went to match them together. I found that didn't matter how carefully I cut them though, there were always some edges that didn't line up quite right so I stopped worrying about it and just cut it out quickly using my rotary cutter and mat. Sewing around each piece with a 3/8" seam allowance seemed to provide enough wiggle room to allow for those discrepancies.
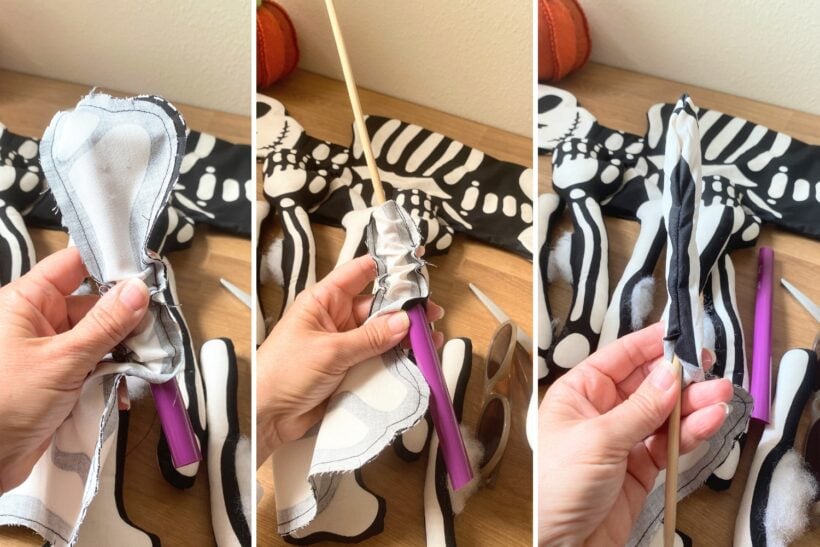
2. Use a Tube Turner to turn the bones
I pulled out a favorite sewing tool for this project. My Tube Turner set. This tool came in so handy and saved me so much time turning the bones right side out. Simply slide the 1/2" tube into the opening in and push the stick down the center. Repeat for the other end and you are done! The stick end comes in handy for pushing out all the seams too.
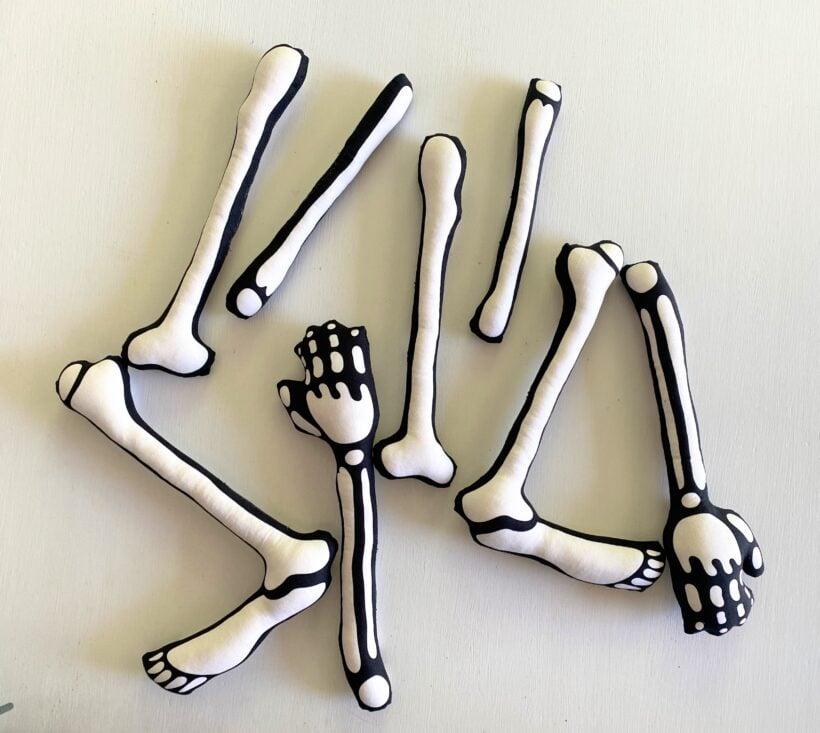
3. Stuff Each Bone until its VERY Firm
It is easy to think you have enough stuffing, but my advice is that if you think you have enough, add more! The stiffer the bones are the better they will hold up and not bend as the skeleton is moved. I used the tubes from the tube turner set to push the stuffing all the way to the ends. I found that the stick just slides through the stuffing but the tube pushed it down nicely.
4. Use a Long Paint Stick for the Body Support
The pattern calls for a dowel to be inserted into the body/head to stabilize it. I was in a rush and couldn't find a dowel at Walmart, so I grabbed a long paint stirring stick. A 3 pack was only about $1.50 so the price was right. It turned out to be the perfect length. I tried to wrap the stick with batting a little and it seemed to work. Since my opening was on a side seam I did have to unpick quite a bit to get the stick to go in. If I did it again I would just unpick a little opening on one end to shove the stick through instead of trying to slide it in from the side.

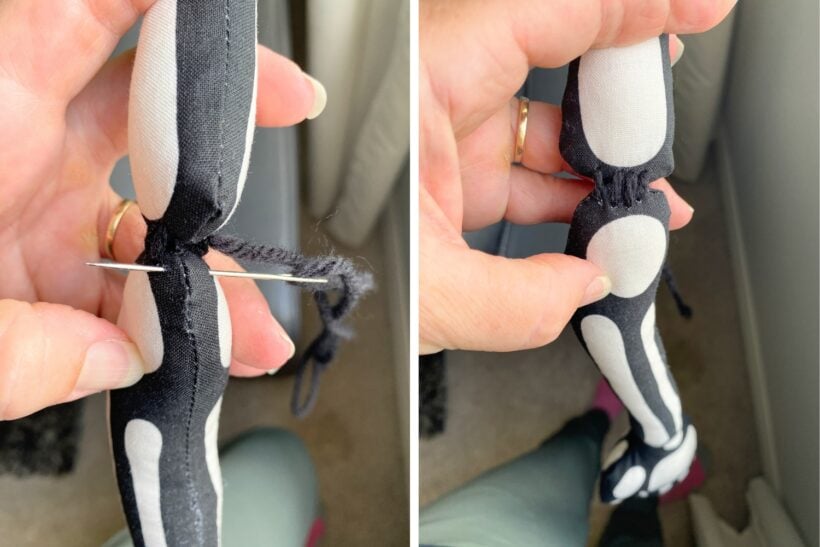
5. Sew the Joints Together with Yarn
To attach each bone to the body, I used a large eyed needle threaded with black yarn. I tied a knot in one end and started it in the middle of the joint then did a loose whip stitch around both bones 4 times. Then I tied a knot, buried the tail and cut the yarn. This seems to be strong enough hold the joints together while still leaving some flexibility to bend the arms and legs.
I hope those tips help! I'd love to to know if you make Mr. Bones Skeleton too.
Halloween sewing is so fun!
#mrbones #mymindseye #handmadehalloween #halloweensewing #sewingforhalloween #spooky #bigstuffedskeleton #rileyblakedesigns #skeleton
More Halloween sewing Instpiration