
It is craft fair season and even though I don't get to sell at a craft fair this year I want to show you how I make one of my very favorite things to sell... Keychains! I guess Wristlet Key Fob is a more accurate name but whatever you call them, they are everyone's favorite gift! Teachers, girlfriends, moms, and sisters all love them. Snap them to your ring of keys and they are so much easier to find. They are easy and fast to make and a great thing to make to sell at a craft fair
How to Sew a Wristlet Key Fob
There are a lot of tutorials for these out there but this is my tried and true method for making a wristlet key fob fast and functional. I have made 100's of these. You can finish them with a little scrap of leather or a piece of coordinating fabric. I'll show you both ways. Want to make some with me today? Let's get sewing! Watch the Video tutorial below or scroll for the full photo tutorial.
Sewing Supplies
For each wristlet key fob you’ll need:
- a 4” x 13’’ strip of printed fabric such as quilting cotton or decorator fabric.
- a 7/8” x 13” strip of felt or cotton batting
- a 3/4” x 2 1/2” leather strip OR a 1 1/2 ” x 3 1/2” strip of coordinating fabric.
- 1” swivel clasp - These are way cheaper if you buy them in bulk

Sewing Instructions
1. Fold fabric strip in HALF lengthwise. Press to form a crease down the center.
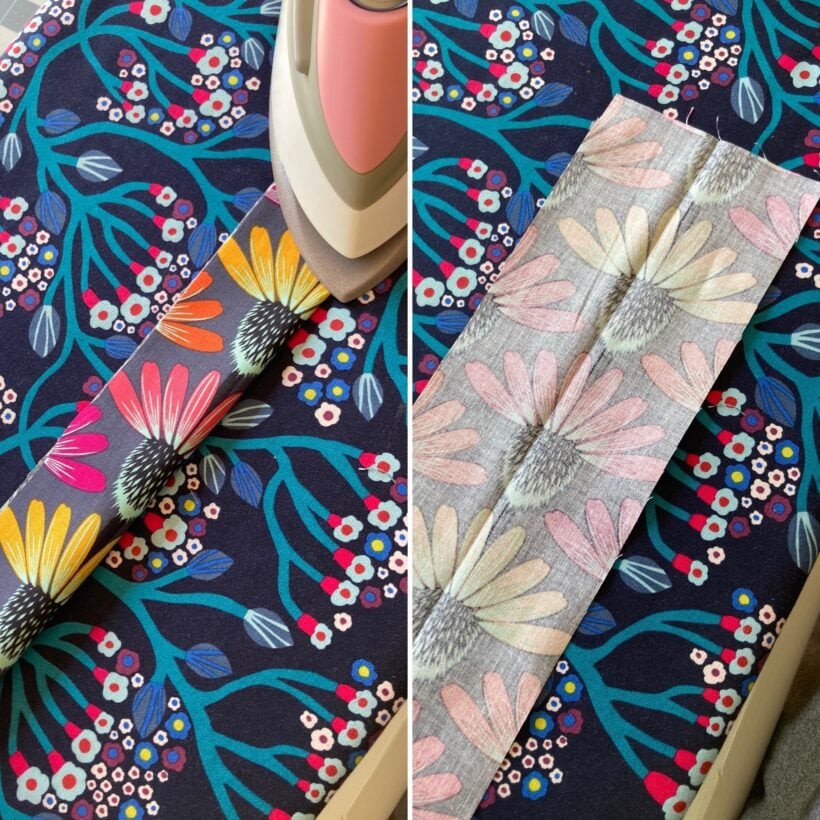
2. Open the strip up and press the raw edges toward the center crease. Leave about a scant 1/8” gap in the center.

3. Open a fold and insert a strip of batting into one side. Refold the 3 folds and press. All long raw edges should be tucked on the inside. Pin the folds so they stay put if you are making more than one.

4. Stitch along each long side about 1/8” away from the edge. I usually increase the stitch length to 3.5 for this topstitching to make it look a little nicer.

5. Thread the strip through a swivel clasp.

6. Overlap the short ends slightly and stitch them together with a zig zag stitch. Stitch back and forth 3-4 times. Rotate the strap so that the zig zag stitches are about 1/2 '' away from the swivel clasp.


Finish the Wristlet Key Fob
Option 1. Add the leather strip:
Fold the leather strip in half matching the short ends with right sides together. I use a clip on the fold to hold it in place as I place it under the sewing machine.
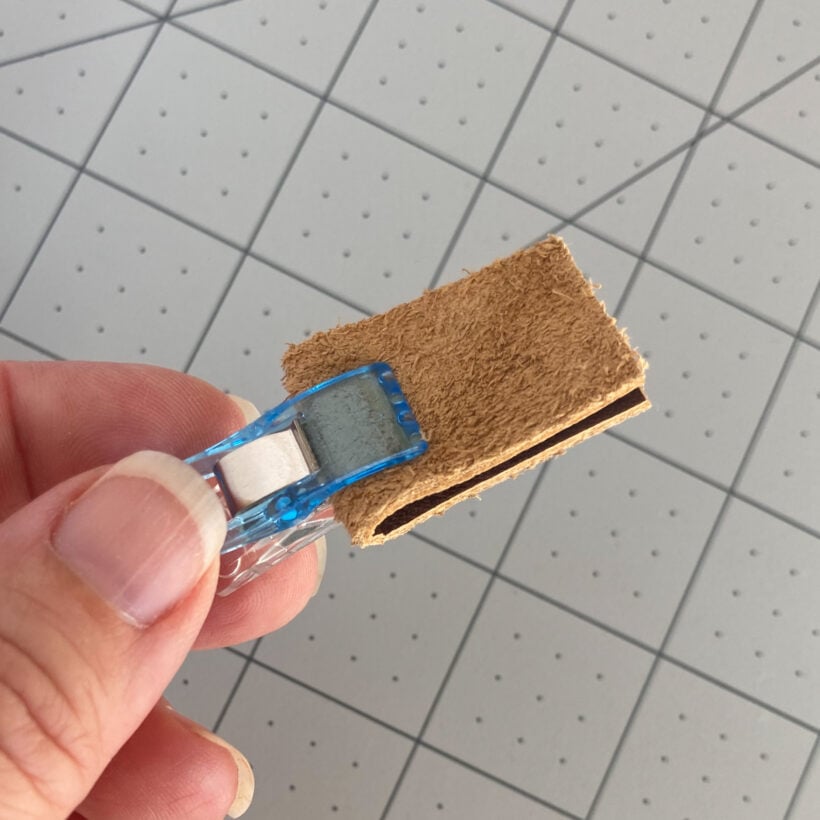
Sew along the short end using a zig zag stitch to make a loop, sew back and forth 2-3 times.

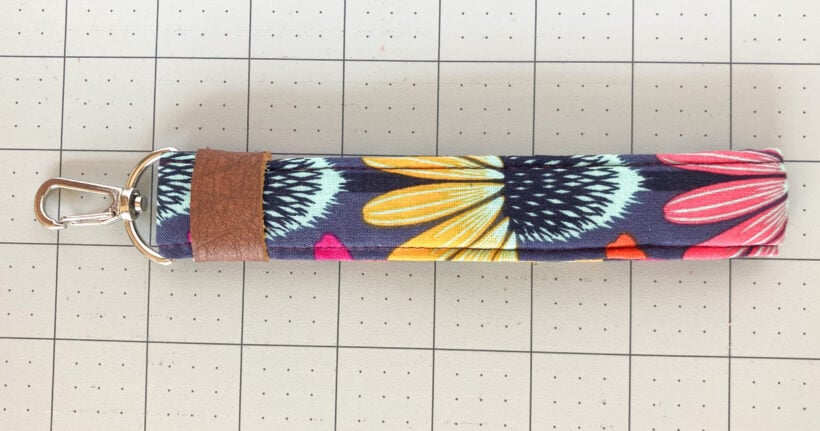
Turn the loop right side out and stretch the seam a little. Slide the leather loop over the folded strap end. Use the end of a ruler or pen to help push the wristlet key fob through.


Position the leather over the zig zag stitches to hide them. Move the seam of the leather to the side and add a little glue on each side under the leather to hold it in place.

Option 2. Add the fabric strip:
Fold the fabric strip lengthwise in thirds so that no long raw edges show from one side.
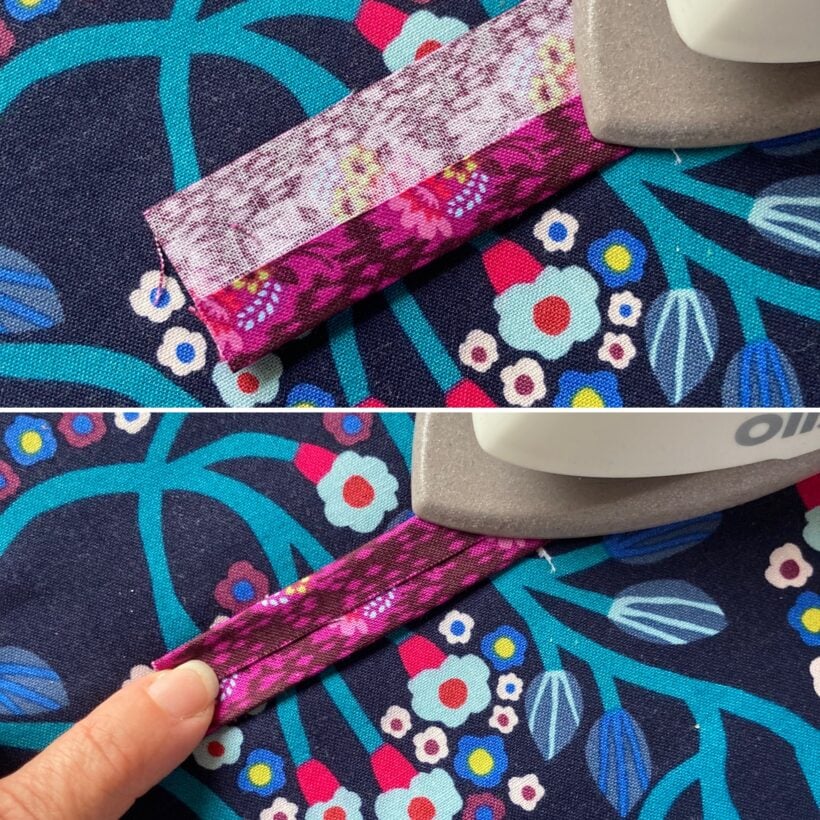
Tuck a short end of the strip between the two straps near the swivel clasp. Wrap the strip around the wristlet key fob hiding the zig zag stitching. Tuck the 2nd end next to the first end.
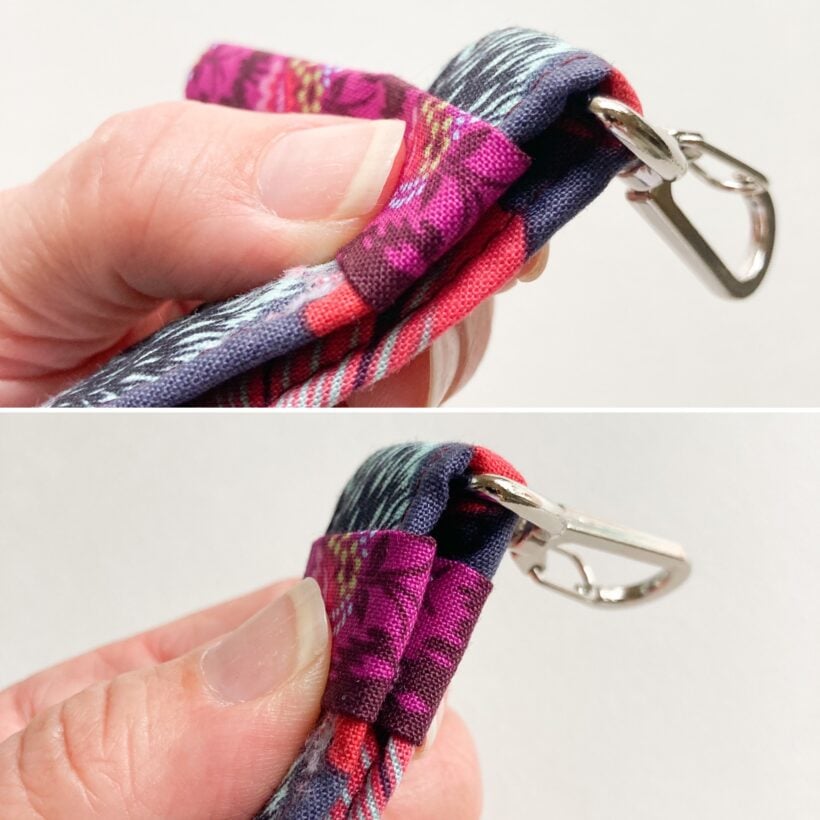
Sew along each side of the fabric strip to hold it in place.
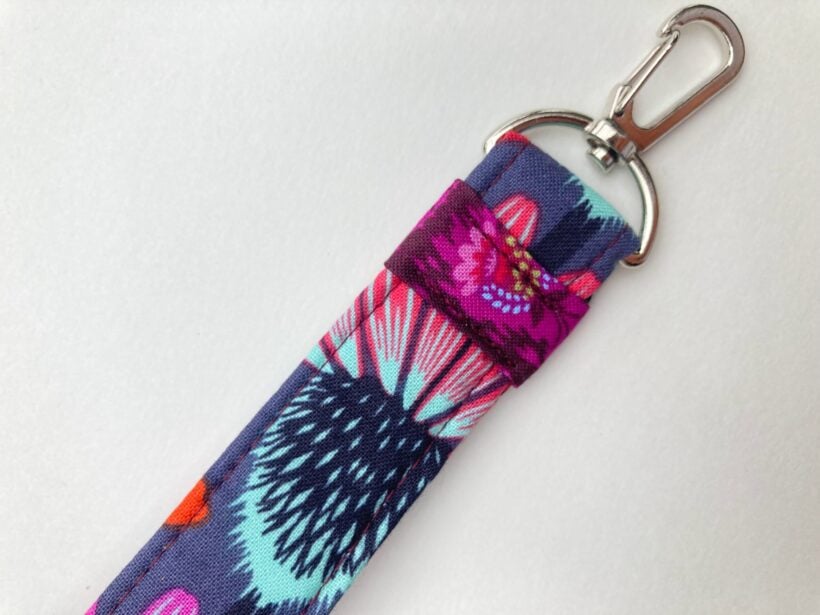
There you have it!! Two ways to make a fun Key Fob gift. If you make some of these I'd love to see them! tag me @bluesusanmakes on Instagram or Facebook.
Click here for more gifts to make and give...
Happy Sewing!
