
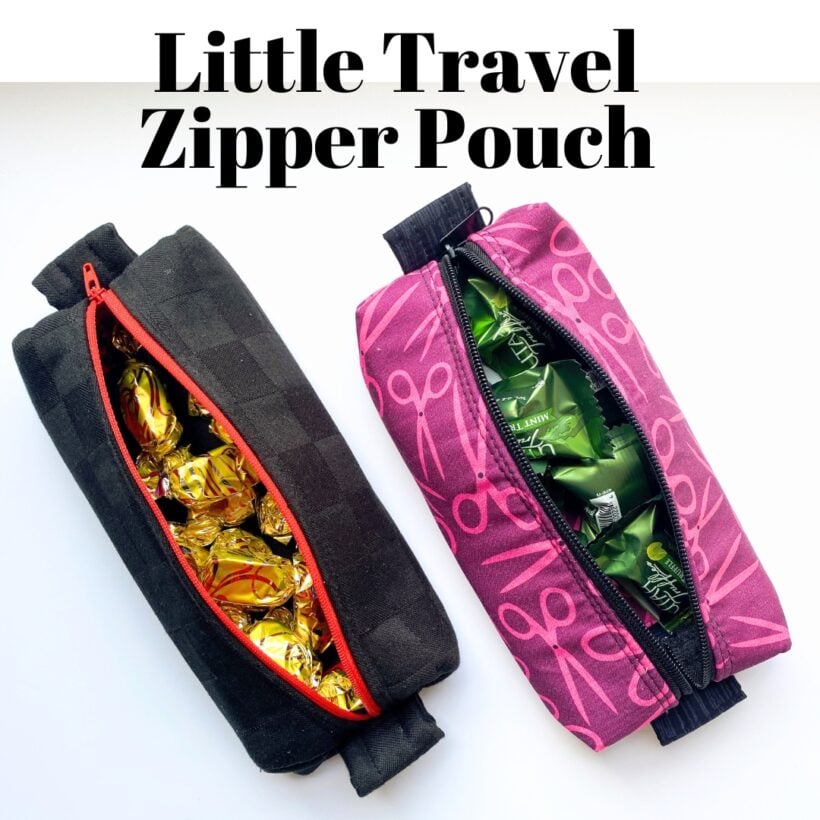
My mom recently had her 80th birthday and I was lucky enough to be able to make quick trip to fly out and spend the weekend with her. She loves handmade gifts and she's been doing a lot of traveling lately so I sewed her up a little travel zipper pouch to that's just the right size for her toothbrush, toothpaste, and floss. She says it's perfect for all her hearing aid supplies. Come make one with me today.

This little travel zipper pouch is fully lined and is constructed using the "quilt sandwich" method of bag making. Which means the lining and exterior are treated as one piece instead of sewing the lining separately. It makes it very fast and easy to sew. This little pouch has boxed corners that are easy to sew, Aren't those triangle corners so cute!

See the inside? It has a couple of built in pockets that you can slide some q-tips and a fingernail clipper into and still keep everything separate and tidy.

This travel zipper pouch is also perfect for School supplies, Sewing notions, and gifting a treat at the holidays. All sewn up it measures about 9 1/2" X 4'' X 1 1/4''. Let me show you how to make one!

Little Travel Zipper Pouch Tutorial with Boxed Corners
Supplies
- 1 Fat Quarter of quilting cotton for the exterior. I used fabric from Conservatory Craft by Monika Forsberg
- 1 Fat Quarter of quilting cotton for the interior. I used fabric from Made my Day by Anna Maria Horner
- 12'' x 12'' piece of fabric covered foam stabilizer, like soft and stable or automotive headliner fabric (I used this today)
- 1 zipper 12'' or longer (longer is easier)
Cutting the Travel Zipper Pouch
From the Exterior fabric cut:
- 1 rectangle 10'' x 11'' for the Body
- 1 square 7'' x 7'' for the Interior Pocket
- 1 strip 3'' x 6'' for the Pull Tabs
From the Interior fabric cut:
- 1 rectangle 10'' x 11'' for the Lining
From the fabric covered foam stabilizer cut:
- 1 rectangle 10'' x 11'' for the Body
- 1 strip 1.5'' x 6'' for the Pull Tabs
Sewing the Travel Zipper Pouch
Make the Pull Tabs
1. Place the Pull Tab fabric strip on an ironing board with the wrong side facing up. Fold the long sides toward the center about 1/2 inch until the edges just meet.
2. Open the folds and insert the foam stabilizer strip inside. Re-fold the fabric and press.
3. Stitch along each raw edge about 3/8 inch away from the folded edges.

4. Cut the strip in half to make 2 pull tabs measuring 3'' long each. The raw edges will be folded toward the inside. Keeping the inside of the pull tabs unfinished helps reduce bulk when sewing the pull tabs to the body.

5. Fold the Pull Tab in half and sew a basting stitch along the raw ends. Repeat for the other tab and set aside.

Make the Inside Pocket
6. Fold the pocket piece in half with right sides together. Stitch around the raw edges leaving a 2 inch opening on one end. Clip the corners.

7. Turn the pocket right side out and push out the corners and seams. Tuck the seam allowance in at the opening and press the pocket flat. Topstitch along each short end about 1/8th inch away from the edge.
8. Fold the pocket lengthwise and press a crease in the middle.

Make the Travel Zipper Pouch body
9. Place the 3 layers of the Body together with the fabric covered foam stabilizer in the middle and the wrong sides of each fabric facing toward the stabilizer like a little foam sandwich. Sew a basting stitch around all 4 sides to make one Body piece.

10. Place the prepared pocket piece on top of the lining side in the center. The length of the pocket should run parallel to the long side of the the body piece. Pin in place

11. Topstitch along each long side of the pocket backstitching at the beginning and end. Sew along the crease in the center to divide the pocket.

12. Lay the Body piece with the exterior facing up. Place the zipper with teeth down along one long edge. Make sure the zipper is parallel to the pocket piece. Bin or glue baste in place. Using a zipper foot attachment sew along the zipper.

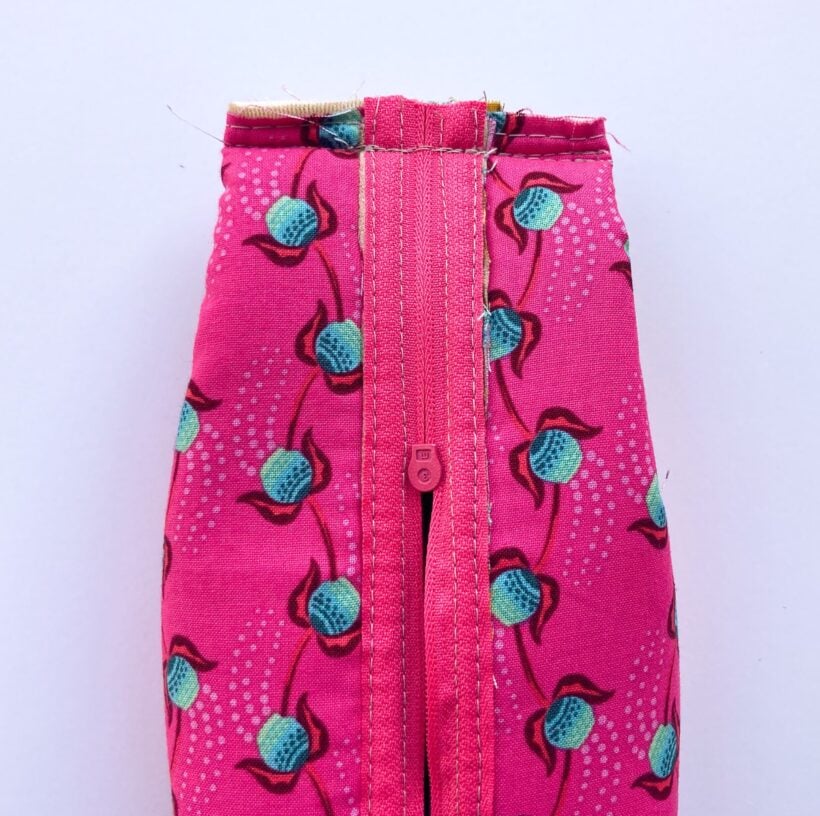
13. Fold the zipper teeth out and enclose the seam under the zipper tape. Trim the raw edge a little if it sticks out from under the zipper tape. Topstitch along the edge of the zipper tape to enclose the raw edges of the seam.

14. Fold the Body with the exterior sides together and match the other long edge to the unsewn edge of the zipper. Pin or glue baste in place. Sew along the zipper using a Zipper Foot. (Oops! Ignore the placement of the pocket in the photo below. I accidentally sewed the zipper to the short side)

15. Unzip the zipper all the way and fold the zipper away from the seam to show the teeth. Sew along the edge of the zipper tape to enclose the seam as before.

16. Zip up the zipper about half way. Turn the piece so that the lining side is facing out. Trim off the extra length of zipper from each side.

17. Pinch the pouch together with the zipper in the center. Slide the Pull Tabs between the layers centered under the zipper and pin them in place . Baste the Pull Tabs in place if desired.

18. Reverse the fold at each corner and push it into the center so that the new fold is sitting next to the pull tab. Pin in place. This little accordion pleat is what makes that cute triangle gusset when we turn it right side out.

19. Sew the end with a 1/2 inch seam allowance. Sew a Zig Zag stitch along the raw edge to finish it off. You can attach a strip of bias tape to finish the seam if you wish but I'm ok with the zig zag.

20. Repeat steps. 17-19 to finish the opposite side of the pouch
21. Turn the travel zipper pouch right side out and push out the corners. You are finished!!
I hoped you enjoyed this free tutorial! If you make one I'd love to see it! Tag me @bluesusanmakes on Instagram or Facebook.

You may also like these other free zipper pouch patterns!
Happy Sewing!!
This really is a fun pattern. It is so versatile and sews up quickly ( I can sew 2 in a little over an hour). I have made it several times for gifting. Some use it for make up or for organizing charging cords when they travel, and some use it for a pencil case or to old a special set of markers. I love the structure that the foam stabilizer gives it. Thanks for this tutorial Sarah!
You are welcome! Its so fun that you’ve sewn so many. They really are surprisingly fast to sew!