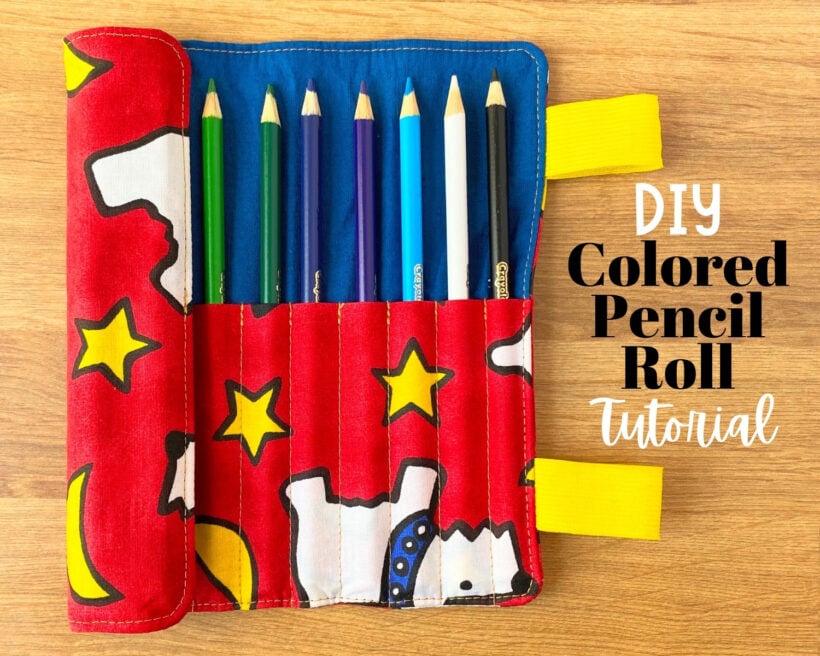
Hello Sewing friends! School starts for us this week so I'm coming at you today with a new tutorial... How to make a Colored Pencil Roll! These little colored pencil holders come in handy in so many places. They are great for school but they are also great to throw in your bag for travel, church, and keeping little artists busy at a restaurant. They make great gifts too and are a great beginner sewing project if you are just starting out in your sewing journey or teaching a friend to sew!
How to Make a Colored Pencil Roll

What is a Colored Pencil Roll?
A colored pencil roll is a little fabric sleeve that you can store colored pencils in and then roll them up securely to store them in a bag on the go.
I've made these to sell in craft fairs, to give as gifts, and to teach others to sew!
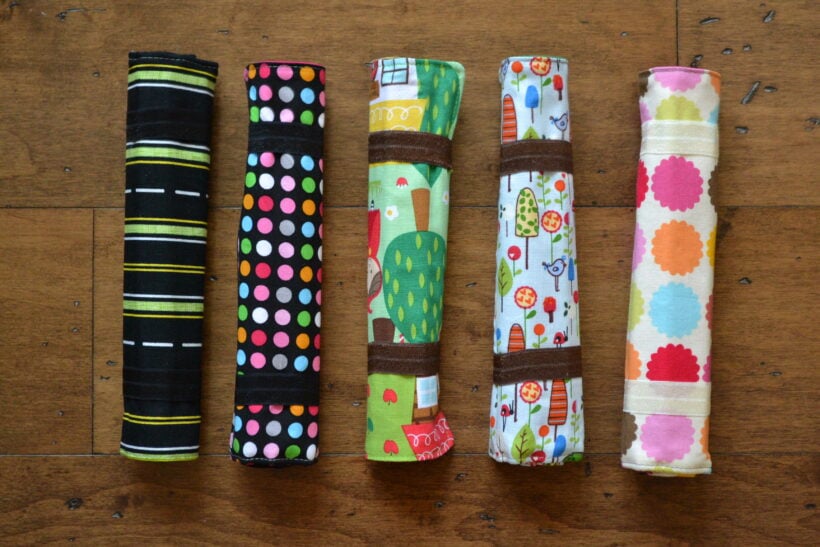
There are many ways to to keep it rolled up, you can use a button and loop, ribbon ties, elastic hair ties (pictured below), 'fold over' elastic pictured above, or 1 inch elastic.

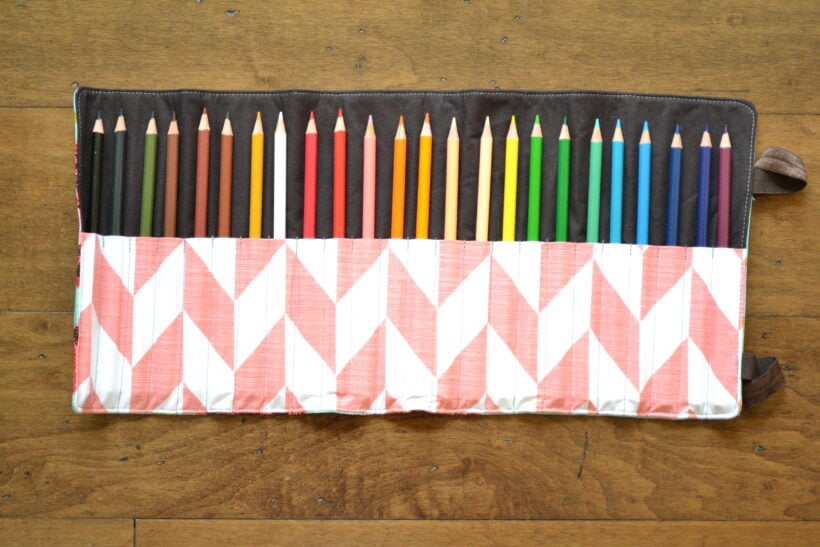
I'm using this colored 1" elastic in my tutorial today. Over the years sewing and using these, I have found that elastic is the easiest to use and the least time consuming to sew in. You can make these pencil holders any size but I've added cutting dimensions to make a 12 count and a 24 count colored pencil roll.
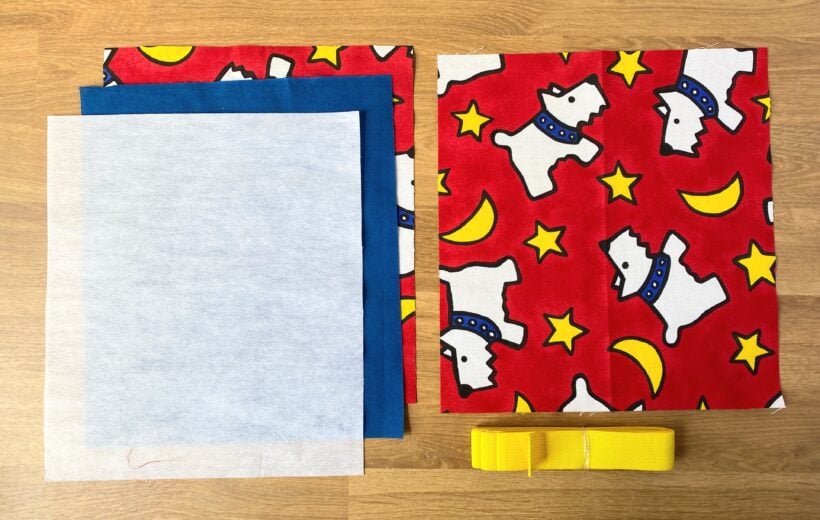
Supplies You'll Need
- 3 Fat Quarters of coordinating fabric (1 for the exterior, 1 for the inside pocket, and 1 for the lining)
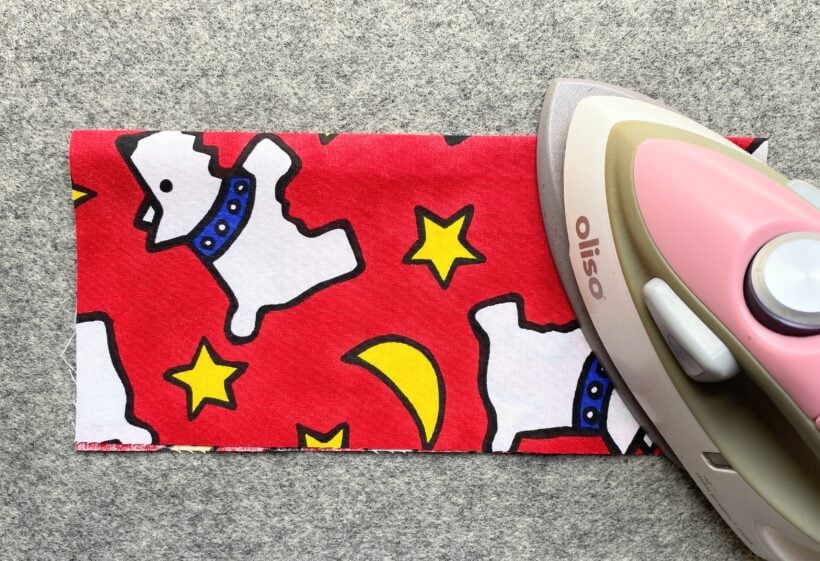
- Lightweight or medium weight fusible interfacing. I like this Interfacing from HeatnBond
- 8" Fold Over Elastic (used on the rolls shown above) or 1" elastic (used in this tutorial)
- Disappearing ink marking pen or pencil
Cutting Dimensions
For the 24 ct. Colored Pencil roll:
- From the Exterior fabric - cut 1 rectangle 19 3/4" x 8 1/2"
- From the interior fabric - cut 1 rectangle 19 3/4" x 8 1/2"
- From the Interfacing - cut 1 rectangle 19 3/4" x 8 1/2"
- From the pocket fabric - cut 1 rectangle 19 3/4" x 9"
- From the Elastic - cut 2 pieces 5 1/2" each
For the 12 ct. Colored Pencil roll:
- From the Exterior fabric - cut 1 rectangle 9 3/4" x 8 1/2"
- From the interior fabric - cut 1 rectangle 9 3/4" x 8 1/2"
- From the Interfacing - cut 1 rectangle 9 3/4" x 8 1/2"
- From the pocket fabric - cut 1 rectangle 19 3/4" x 9"
- From the Elastic - cut 2 pieces 4 1/2" each
I'm making a 12 count roll for this example. I also chose the same fabric for the exterior as I did for the inside pocket but you can choose 3 different colors if you want to.
Sewing Instructions
1. Fold pocket in half with wrong sides together to make a 4 1/2" x 8 1/2" rectangle. Press the fold. Pay attention to the direction you fold it. It is easy to fold it the wrong way and have your pocket come up a little short.
2. Fuse the interfacing to the back of the interior piece.

3. Pin the folded pocket piece to the right side of the interior piece. Match the raw edges and make sure the fold is in the middle

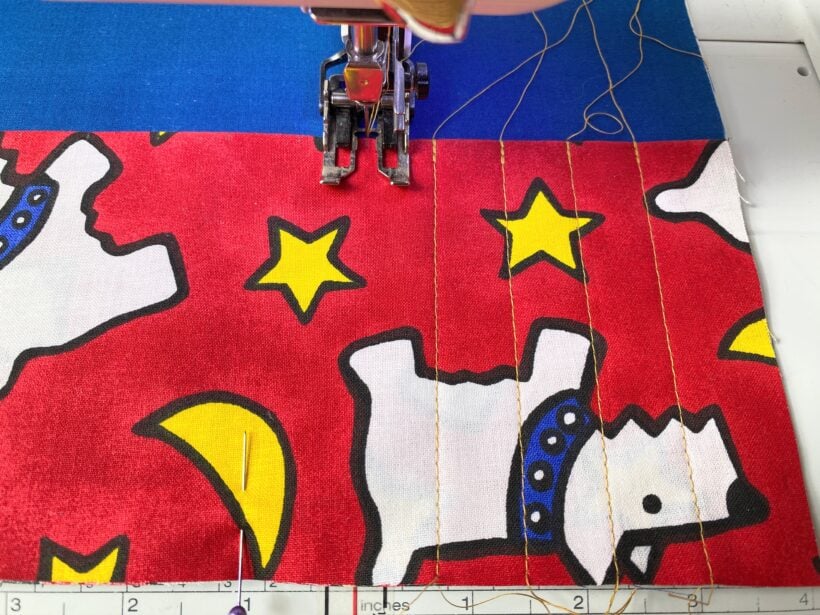
4. Mark the stitch line starting points along the folded edge of the pocket using a marking pen or pencil. Working from left to right, make the first marking at 1 1/8" away from one side and then every 3/4". The last marking should be 1 1/8" away from the edge. I like to use a pencil to mark just the top of the line. Because the lead is a little shiny it seems to show up on dark and light colored fabrics. The stitches usually cover up the marking so I don't need to worry about erasing the marks.

5. Stitch a line across the pocket at each marking. I just eyeball it and try to keep them straight but you can mark the whole stitch line if you need to. Don't forget to backstitch at the top of the pocket.
Tips for sewing in a straight line:
- Let the machine pull the fabric and just hold the fabric evenly on both sides as you sew the line.
- Watch the previous stitch line to make sure you are running parallel to it.
- Look for any perpendicular lines such as the edge of your sewing machine and makes sure the bottom of the pocket matches it as it moves across.
- Use a seam guide set to 3/4".
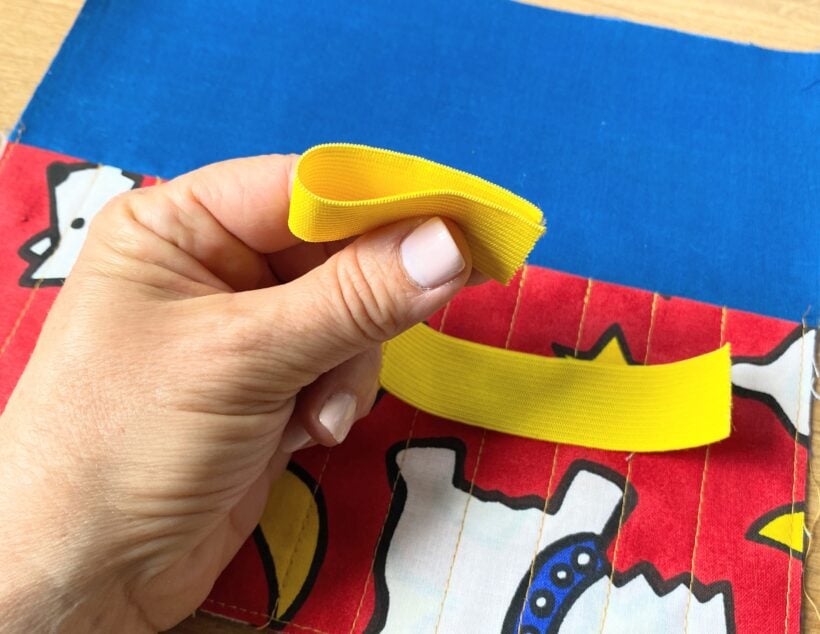
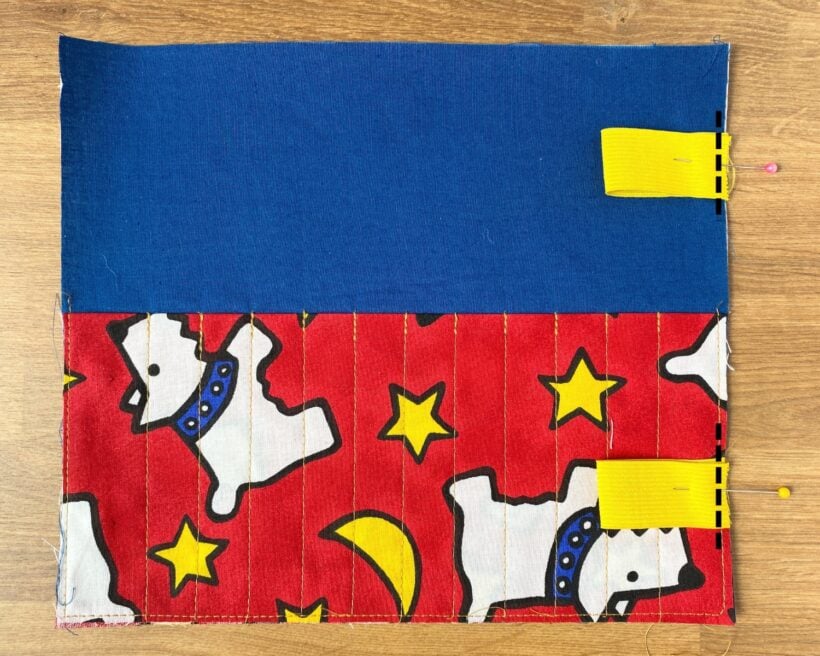
6. Fold each elastic piece in half with right sides together (if there is a right side). Pin the elastic about 2" away from each corner on the right hand short side of the interior. I pin it just inside the 2" mark. Baste the elastic in place and baste around the raw edges of the pocket about 1/8" away from the edge.
7. Place the exterior piece on top of the interior piece with the right sides together. Pin around the perimeter and remember where the bottom of the pocket is.

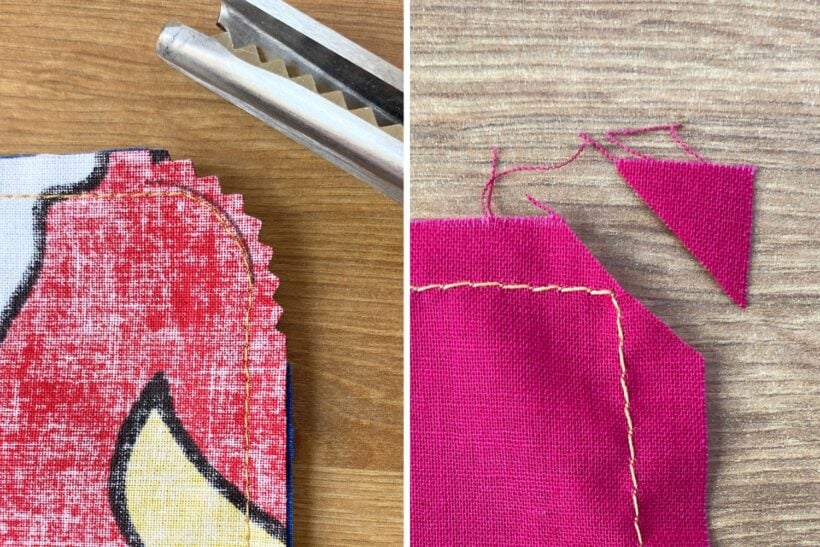
8. If you want the final colored pencil roll to have curved corners, draw a little curve on each corner about 1/4" away each straight edge using a spool of thread as a guide. Skip this step if you want to leave the corner square.
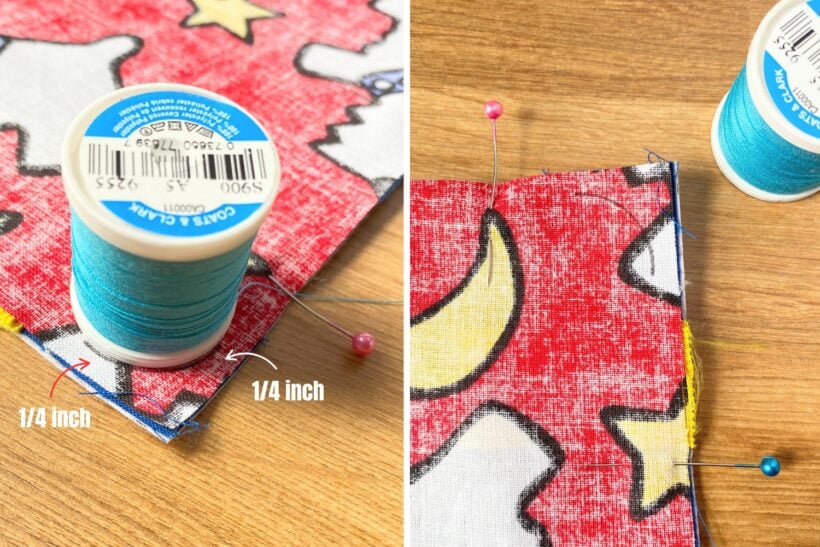
9. Sew around all sides with a 1/4" seam allowance. When you get to the curve sew directly on the drawn line or use it as a guide to sew the curve. Leave about 3" open in the bottom for turning. Also backstitch and sew across each elastic piece twice.

10. Clip the corners if you are leaving them square or cut notches out of each curve if you've sewn curved corners.
11. Turn the Colored Pencil Roll right side out.

12. Push out the seams all the way and press the colored pencil roll flat.

13.Tuck in the raw edges of the opening and press a crease to match the seams on each side.

14. Pin or clip the opening in place.

13. Topstitch around all sides of the colored pencil roll about 1/8" from the seam. I like to start at the top of the pocket on the left sided. This topstitching also sews the opening closed.
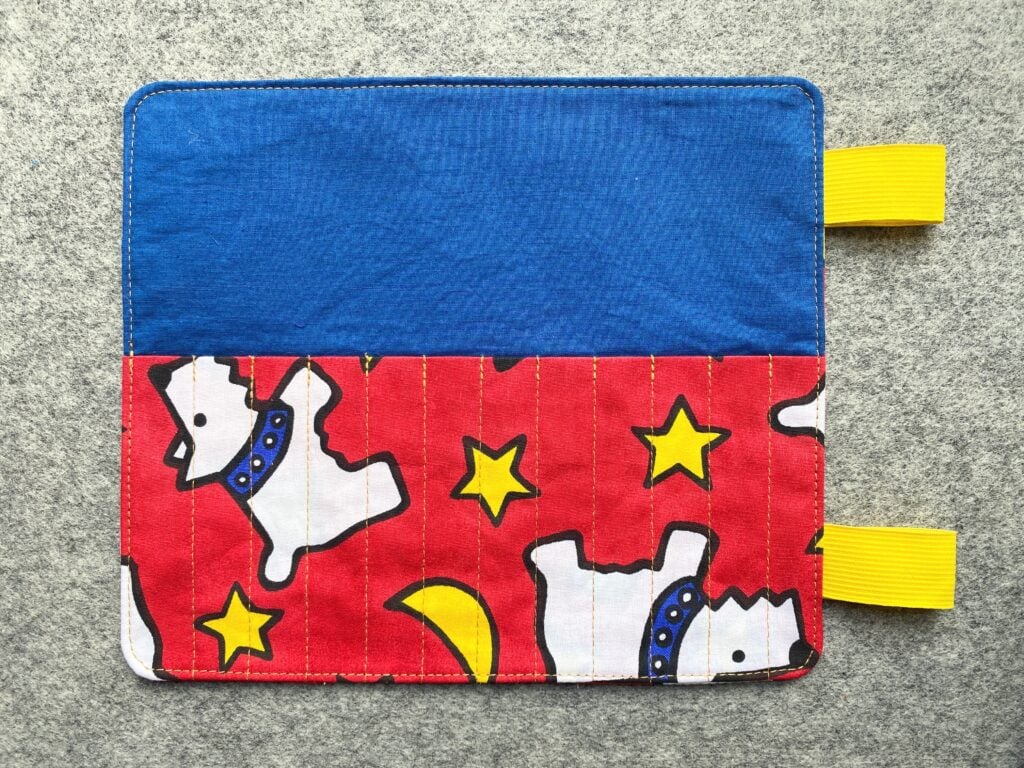
And you're done!! Now stuff it with a rainbow of colored pencils and roll it up.

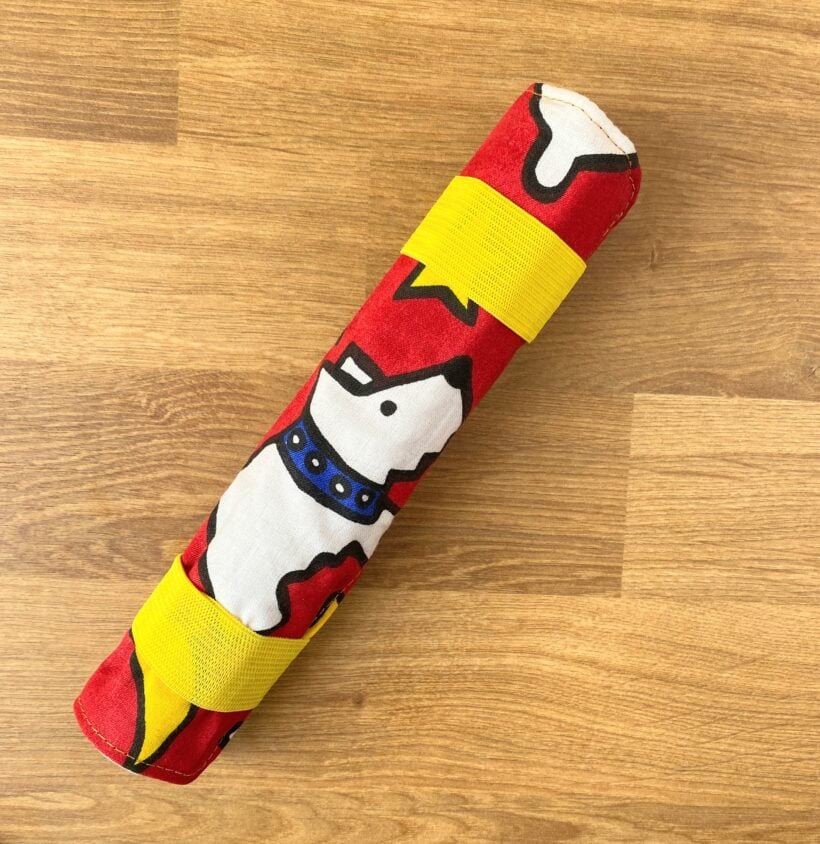
Now it's ready to go to school, gift, stuff in an Easter basket, sell at a craft fair, etc!