Showing posts sorted by date for query tutorials. Sort by relevance Show all posts

Quick Summer Cutt-offs Get a Touch of Fabric!

I love wearing Jeans!  Love them! About this time of year I like to chop my favorite fading pair off so can enjoy them as shorts.  We are experiencing an unusually cool spring here in Florida but it is about to get HOT.  And when it gets that hot skirts are best, but for now I'll wear my cut-offs.  This morning I decided combine my beloved cut-off Jeans with another love of mine, Fabric!  I added a little bias trim to the bottom to keep that fraying in check.
 

Just a little cute. Just a little pop.   Fun right?  

There are loads of tutorials out there on how to apply bias tape.  I think it would be cute if the bias was wider too...What do you think?

Confessions of a Soccer Mom: 4 tips to Survive the Season

Since I love to read about how other people manage all they do with a bunch of kids, today I'm writing about just that. Well, as far as Soccer is concerned at least.  I confess, I was a bit leery of putting all 4 kids in Soccer this season.  I was afraid of getting stretched in too many directions and we don't have family around to help.  Watching 4 soccer games each Saturday didn't sound like what I wanted to do with my time.   But I am here to say the way it has worked out has been totally doable.    My younger three play in the Rec league and my oldest plays Competitive.  Thankfully her team does not usually travel too far.  Because games somewhat overlap, most of the time my husband and I each end up watching 2 or 3 games a Saturday.  Most Saturdays we are home by 2 and sometimes wear are done by 11 am.  


Here are a few things we've done to help the season run more smoothly. 


1. Step up and coach!

  This season I am coaching my littlest son's team and my husband coaches my oldest boy's team.  When you are the coach you get to pick the practice schedules.  When everyone's practices are on the same nights it makes our lives a whole lot easier.  We just contacted my middle son's coach and made our practices around the same times.    I have no soccer experience, which is totally fine for the younger age groups.   The league gives us suggested practice plans and there are a lot of online resources as well.  I love it because a get to play with my son and get a little exercise too.  You can do it too!

2. Make Friends! 

Make friends with the parents of other kids on your team.  Most of the time I just like to keep to myself but getting to know other families with multiple kids in soccer has saved my life.  When games overlap or I have to be two places at one time I know them well enough to trust them with my kids and help me out.  Chances are they'll need my help another week and it all works out. 


3. Carpool!
Any mom of more than 2 kids knows that carpools can be a life saver. My daughter has practice from 6:30-8:00 two times a week at a different field than the rest of us.  We take her and a friend to the practices and the friend's mom pick up.  It is great because we are in the middle of getting the rest to bed at pick up time.

4. Ice Cream!

I have another confession to make, we bribe our kids with Ice Cream.  If anyone scores a goal in a game they earn Ice Cream for the family that day.  We started this little tradition to add a little motivation to my timid kids and make the games a little more exciting.  Of course this mainly just works for the younger ones.  The older ones don't always have an opportunity to score goals depending on the position they play.  Sometimes hard work and excellent playing earns ice cream too.  With 4 kids playing we celebrate with ice cream every week.  One crazy day my youngest scored 7.  He was so excited and proud to earn his family ice cream.

That's all for today!  I am not going to lie and say it isn't all a little crazy.  We do get the fields late sometimes and lose the occasional shin guard along the way. I even forgot about make up pictures for my son this week and he had to squeeze into the littlest's uniform for the picture, which was less conspicuous than the tie dye shirt he was wearing.  But we are doing it.  My kids love it and because they do, I do to. 

Looking for more Soccer Mom tips and tutorials? 


Soccer Mom Meal Prep with Clean Eating Mom


Today we have a guest joining us for our Soccer Mom series! Clean Eating Mom is giving us her best meal planning tips and a recipe for delicious bean and rice burritos.

I Am a Soccer Mom: Sideline Survival Activities


One thing I love about having my kids in soccer is that it is outside.  They get to get out and breathe the fresh air and run around.  During weekday practices my kids who aren't practicing run around and play with other kids, but on game days they don't always have the luxury of running around freely with games going on all around us.  My kids get bored sitting and watching a game, especially if there are a couple to watch in a row, so we always try to bring a few sideline activities to keep them occupied.  It is easy to just let them play the iPad or Kindle, and sometimes we do that too, but I always like it more if they are doing something imaginative.  So today, as part of the Soccer Mom series, I've put together a few ideas of how we spend our time on the sidelines. We usually switch up the things we pack so they don't get old.  

Magna Doodle Tracing Cards
First up, here's a fun idea for using  a travel sized Magna-doodle.  My sister in law made us a bunch of cards with simple drawings on them that fit perfectly inside the drawing surface.  You can trace the lines of the drawing and then lift up the card and see your masterpiece.  It really works.  It is so fun for kids of all ages and has provided hours of sideline distraction.  We also have my littlest practice his letters this way by tracing ABC flashcards.  

You can easily make this by tracing simple pictures from coloring books onto manila folders and cutting them to the right size.  Or if you are a talented artist like my, SIL Becky, you can draw your own. 

Portable Sandbox
One year we brought a portable sandbox to the fields each week.  We found a plastic bin with a handle and filled it with about 3 inches of sand and toys to play with.  We were the most popular family on the sideline.  It was especially good for little ones that usually like to run into the field.  If a little sand spills, no big deal, its outside.  If your kid is likely to dump a lot of sand just put the sandbox in the middle of a blanket and you can dump the sand in the box when they are done. It was a hit!
Photo from Amazon


Books
I also sometimes bring books for my readers, and a crayon roll and a notebook for my artists.  My older readers especially love to lay on a blanket and read endlessly.


Cars 
I have to say that Cars and are still my kids' absolute favorite things to play with at the fields.  They love to bring their monster trucks and drive them over the little mounds in the grass.   I have a friend that fills a duffle bag full of big cars and boats for her little one to play with at the fields.  If you make the Waterproof Blanket you can easily draw a car town on the vinyl side of it for added fun.  I had grand intentions of making this cool version from Family Fun that I Pinned a couple of years ago.  
Family Fun May 2011
 It took me forever to find a green vinyl tablecloth, but I couldn't find the black contact paper, so instead I just drew a simple one on with Sharpie. I figure I'll let my kids draw buildings or ponds if they want.


Bouncy Ball
My last idea is to keep it simple.  Sometimes I bring interesting things to play with and I find that all my kids really needed to have fun was a bouncy ball and the bleachers. :)


I hope these ideas come in handy sometime.  What sideline activities keep your little ones occupied?

Want to see more tips and tutorials in my Soccer Mom Series? Here are the links


Are you a Soccer Mom?


Hi friends!  Is it Soccer season in your neck of the woods?  We are mid-way through Spring Soccer here in Florida and I have come to a realization, I am a Soccer Mom!  I drive a minivan and I have 4 children in soccer this season, so I guess that makes it official.  I am a soccer mom in the most literal sense of the word.   I'm even coaching this year!  Yep, that's me getting ready to coach my littlest son's game.

Yes, I would rather not have everyone playing soccer, but they all love it so and I have a hard time making the young ones sit on the sidelines and just be spectators. And so this is our first season with everyone on their own team.  We have pulled off 3 kids in soccer for a while so that makes me an expert on how to make it all happen right? Getting out the door on time, dinner, keeping track of the uniforms. Ha! Not really an expert,  but I think  I've figured out a few things that make it all run more smoothly and I want to share them.  Starting Monday, for the rest of the month of April I will be running a little Soccer Mom series over here on Blue Susan Makes.


   I'll give you a little run down of the tricks I've learned over the years that have helped make our soccer seasons successful and kept me from pulling my hair out in craziness. "But, this is a sewing blog!" I can hear you saying.  Don't worry, I have sewing tutorials to share as well that you won't want to miss.  And have you had a chance to check out the new handbag patterns released by Sara at Sew Sweetness? They are fabulous!

At the end of my Soccer Mom series Sara is letting me giveaway a pack of patterns to 3 lucky readers.


Of course, if soccer's not your sport, all these tips can be used for any sport your kids might be in as well.  Do you have something to share too?  I would love your input, I want to know what works for you!
 Get excited, I know I am!

See all of  the posts in this Series


Announcing theTwelve Days of Christmas!

Hi there! I am just quickly posting to tell you about The Twelve days of Christmas going on at Ellie Inspired. Ellie Inspired is a sewing blog that features tutorials and patterns for cute little girls dresses.


For the next 12 days she is introducing a new pattern and hosting a blog hop.   12 days of Christmas starts today.  You should see the prizes offered in the massive 35 prize giveaway!  For the blog hop each day a different blog will post a Christmas related craft/tutorial/recipe.  I get to be Day 12 on the tour so be sure to come back and visit me on November 21 when I'll show you how to sew up a cute Christmas gift.
Hope your weekend is going great!  
We just finished soccer games and are off to do a little clothes shopping.
Ciao! 

Gift Shop Travel Tissue Covers


Every year our elementary school has a Holiday gift shop for the kids to shop at.  They always ask for donations of items to sell.   This year I actually donated some handmade goodies. 
Travel tissue covers! 

Zipper success!

We're well into November already...I think it's time for an update.   I'm sewing the cutest little toy tote bags for the upcoming craft fair right now.  I'm in love with them.  Alas, no pictures yet.   But I will show you another little bag I made last week.   I snapped these pics the night I finished making it just before packing it up for the morning farmer's market.  Good thing I took pictures too, because it sold that next day and I would have missed my chance.   A little sling bag with rouching down the middle.


I  finally figured out another way to put a zipper closure in the top.  I think I've said before that zipper closures on the top of bags totally intimidate me.  But everybody loves to have a zipper in the top of their bag and always asks if I can make them that way and I like a good challenge so I press on!


 I've put a zipper in a purse before Here and Here, but this way is different and might be less complicated.  I just had to figure out how to insert the handle and adjust the pattern for it.  I dream of someday doing a series of tutorials that would let you build your own handbag...wouldn't that be fun?  Unfortunately not this year.


I've made a little wristlet to match this bag that I'll post pictures of soon...along with the little toy totes.  Did I mention that they are totally cute?   I must sleep now, it is way past my bedtime.

Good Night!

Pullover Towel Toddler Bib Tutorial

As I was mass producing baby bibs I decided to snaps some shots for  a little tutorial.  Not that there is any shortage of baby bib tutorials out there, but they are all just a little different.  So here's my take on the Pullover Towel Toddler Bib.  Thank you for teaching me how to make these mom!!


I had a lot of left over towel pieces from making Hooded Baby towels.  These bibs can also be made from small hand towels also sometimes called fingertip towels, which are already finished on the edges so you don't need to bind them.


Looking for a different version of a pullover toddler bib? Check out these other posts


Pullover Towel Toddler Bib Tutorial 

Let's get started! Gather your materials

For 1 bib you'll need:
  • Towel fabric-  11" X 15"
  • Knit ribbing-  2 1/2 " X 11"
  • about 2 yards of double fold binding (there will be leftover)
  • applique fabric and fusible web for front as desired
  • coordinating thread, of course.

Cutting instructions

Use a cup to trace a curve on the corners of the towel.  For the neck hole use a 5 inch diameter circle and position the circle in the center,  1.5 inches down from the top of the bib.  Trace the circle and then cut on all tracing lines.


Sewing instructions

Apply the bias tape around the edges.  I don't have the energy to go into all the details about bias tape. Thankfully Dana from Made has done such a great job of describing this that I'm going to refer you to her tutorial on sewing on bias tape.  I use the cheating method. :)


Next take the ribbing, fold it in half, and sew the short edges together.


Then fold it in half lengthways so the seam is on the inside, with the seam finger pressed open.


Next, Pin the ribbing to the towel.  To do this, first divide the ribbing in 4 equal sections and mark them with pins or a marking pen.  Then divide and mark the neck hole in for equal sections.  Match up the markings and pin them with raw edges together.  Stretch the ribbing to meet the neck hole and pin as needed.   You should get something like this.


Now using a serger, or stretch stitch on a regular machine,  sew the ribbing onto the neck hole.  Stretch the ribbing as you go to match up the raw edges.  If using a regular machine, zig zag stitch around your raw edges after you've sewn it to minimize fraying.


The front side should look something like this.


Next, use fusible web to apply your desired fabric and zig zag around the edges.


And there you have your bib!


If you use this tutorial to make a bib please link back or leave me a comment to let me know that you did.  I'd love to see what you made!! 

Happy Sewing!


Other posts you may like:

Embellished Tanks

 
I finally finished my other WIP.... Embellished tank tops.  My friend asked me if I could put some ribbon and fabric flowers on some tanks for her grand daughters to wear.  Here's how they turned out.  


For a couple of them I used ribbon and a couple got fabric rosettes. 


Since M. was the right size for the bigger shirts, she got to model them.  Which made me realize I had spaced the bottom one a touch too far away.  That one quickly got fixed.  After that I made 6 yo J. put on the other ones to check placement, he was a good sport about it but did NOT want his picture taken. :)

 
My favorite are the ones made out of ribbons.


I looked for a ribbon flower tutorial that I liked but didn't find one.  I'll have to post on how I made them. 
Can't get this pic to flip.
The fabric flowers were made similarly to THIS tutorial over at Sew in Love.

I will leave you with one more picture of fabric flower bliss that I found when hunting for tutorials to link you to....

Aren't these divine? You can find out how to make them, and another way to arrange them at Snowy Bliss.  I hope to be making these sometime for spring. I know, wrong season, but I had to share.

Over and out!


Weekend Sewing...Summer Tote?

Anyone up for a weekend sewing project?  

I've recently tidied up my sewing area and uncovered some unfinished projects that need attention, so that is what I'll be working on this weekend.  Hopefully I'll have something to show for it next week.   But if you need something sew... read on!  Just in case you missed it, this is a reprint of my guest post last month at Dr. Stephanie's Mental Health Week,


Hi everyone!! I’m Sarah, visiting from blueSusan today.  How fun to be able to do a guest post on Dr. Stephanie’s blog.  Thank you Stephanie for hosting such a fun event.   I love creating things.  I am a stay-at-home mom by profession and I have four sweet and silly kids, ages 10, 8, 5, and 3.


Making things is my therapy, and my creative outlet these days is sewing.  I have been sewing most of my life off and on, but over the last couple of years I have really gotten into it on a regular basis.  A few years ago I was going through a particularly tough time.  I had a fairly new baby (my 4th),  my husband was gone a lot, and I was struggling to keep my head above water.   I felt like I never accomplished anything and never had time to myself.   A couple of my friends had learned to sew and started making a ton of cute things.  I didn’t want to miss out on the fun and I needed something to take my mind off of all my struggles and stresses.  So I set up my sewing machine in my bedroom and started sewing once the kids went down for the night.  Now my sewing machine is a permanent fixture in my bedroom and I use it almost daily.  Sewing helps me unwind and get the “me” time that I need.  Like I said…it’s my therapy!

I make a lot of bags and so I thought share a little tutorial with you for a lovely Summer Tote that is the perfect size for taking to the pool or the beach.


This is an easy one to sew, and relatively quick too.  Want to make one??

 You can find the whole tutorial HERE on my new tutorials page.


Have a great weekend!!

Zipper Pouch Week Day 2

Hello Today!!  I paused teacher gift making to sew up a little wristlet clutch for a cute graduating gal.  This is a simple lined zipper pouch with an added ruffle and handle.


Here's what the inside looks like.  It's the perfect size to hold all the essentials.


Want to make something similar? Dana from Made has a great tutorial with a variety of variations. Check it out!!

Here's a little tip... Once you turn your pouch right side out, you'll have a little hole left that needs to be stitched closed.  Many tutorials instruct you to handsew your inside hole closed.  It saves a ton of time if you just stitch it closed with your machine.   Once you start using your clutch you'll never look twice at how nicely you finished off the inside.


See you tomorrow!

IKEA Tent Tote

Luke got a little tent from Ikea for his birthday last month.  (yes it's crooked because he's already bent one of the poles..errg) 


Anyway, the tent didn't come with anything to keep it in when the campers are not camping, or laying it on it's side and pretending it's a rocket ship.  So I decided to sew up a little storage bag for it. Voila!


 It seems like it would be about the size of a yoga mat carrier, but all the tutorials that I found seemed a little complicated, so I did the next best thing and figured it out on my own.


It's basically just a cylinder with a drawstring top...

And a little shoulder strap.


And because I'm always curious,  here's what the inside looks like where the drawstrings come out.


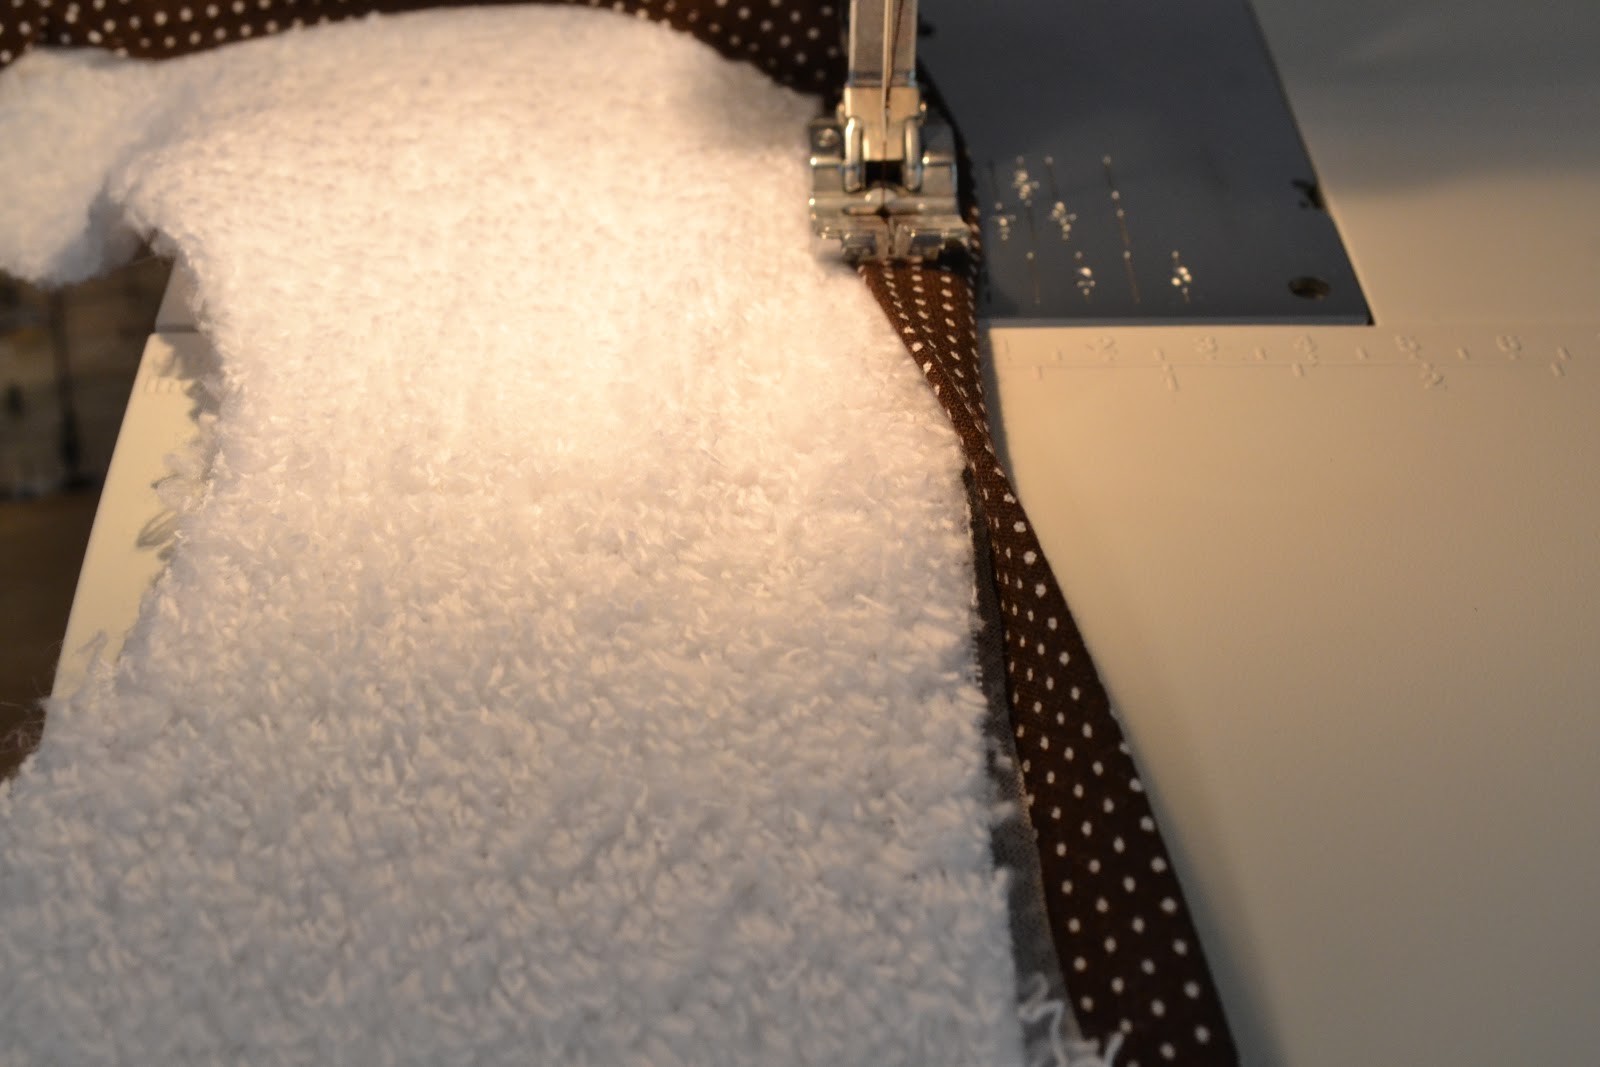
I tried to take a few pictures to show you my process of figuring it out, but I turned out doing it differently than I had planned, that's part of the fun right?

Just in case you have a children's tent from Ikea that needs a home, here are the dimesions of the fabric I cut out.

Body-   14 1/2 in X 29 in rectangle
Base-    4 1/2 in diameter circle
Strap-   17 1/2 in X 4 in folded like bias tape and stitched down each side.

I may try to make one of these again because I think it's the perfect size for a couple of kites I have floating around my garage.  If I do I'll take pictures of how I put the circle onto the body and how I made the drawstring entrance point because I like how it turned out way better than the hassle of putting in buttonholes, if you know what I mean.

And now I'm off to bed. No sewing tonight, but that doesn't mean I don't have something to post for tomorrow.  Instead of making something tonight I watched Glee and added some liquid nails to my Kitchen Banquette that is in the works.  I think we are going to add the seat to it tomorrow.  We constructed it a couple of days ago and it's drying.  I have an 80-ish year old neighbor teaching me how to construct it.  Maybe I should think up something to sew for him as a thank you. :)