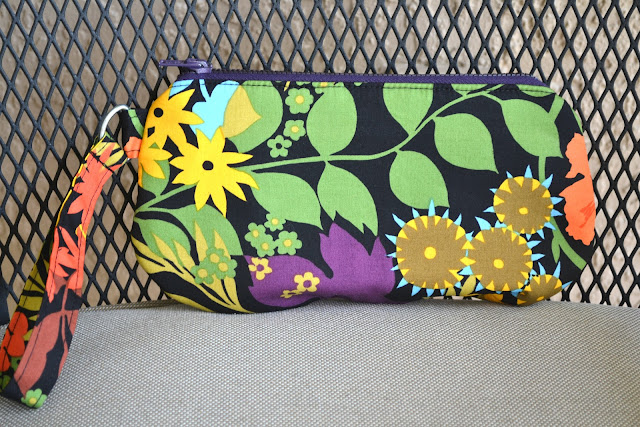
I think it is really fun to give a handmade gift at Christmas. Are you making any Christmas gifts this year? You still have time to whip up something special for your sister, daughter, mom, or BFF. Today I'm sharing a tutorial on how to make my Girlfriend Clutch so you can make one too. Follow along and I'll show you how it's done.
You can also make a single fabric version by omitting the gathered panel like I did in this post!
Girlfriend Clutch Free pattern and Tutorial
It doesn't take much fabric, Here's what you are going to need...
More handmade gifts to sew...
Cutting
Go here to download the pattern piece. Cut 2 for the interior, 2 for the exterior, and 2 out of fusible fleece or felt not pictured (I like to use the thick felt cut from the bolt)
You'll need a 9 inch zipper (or longer).
Make your Additional cuts:
Pocket- 11 in. X 8 in. fold in half lengthwise and press
Accent Panel- 4 1/2 in. X 9 in. cut 1
Accent Strips- 1 1/2 in. X 6 in. cut 2 fold in half lengthwise and press
Strap- 11 in. X 3 in.
Topstitch the gathers, stitching just to one side of the gathering stitches. Pull out the gathering threads and set aside.


Topstitch about 1/8 inch away from each long edge. Fold finished strap in half and position it about 1 in down from the top on one of the exterior pieces, baste in place.

Fold exterior and interior pieces back to expose zipper matching wrong sides together. Press and topstitch 1/8 in. away from seam. Repeat for the other side.
Turn inside out through interior opening. Fold raw edges in and stitch interior opening closed.
You'll need a 9 inch zipper (or longer).
Make your Additional cuts:
Pocket- 11 in. X 8 in. fold in half lengthwise and press
Accent Panel- 4 1/2 in. X 9 in. cut 1
Accent Strips- 1 1/2 in. X 6 in. cut 2 fold in half lengthwise and press
Strap- 11 in. X 3 in.
Sewing
Now you're ready.... Let's get started1. Prepare the Exterior
Iron fusible fleece or felt to the wrong side of exterior pieces. Do not put iron directly on the fleece/felt. It will melt. Lay accent panel right side down on ironing board. Fold each long edge over 1/2 inch and press. Sew a gathering stitch (longest stitch length on your machine) about 1/8 inch from folded edge on each side.
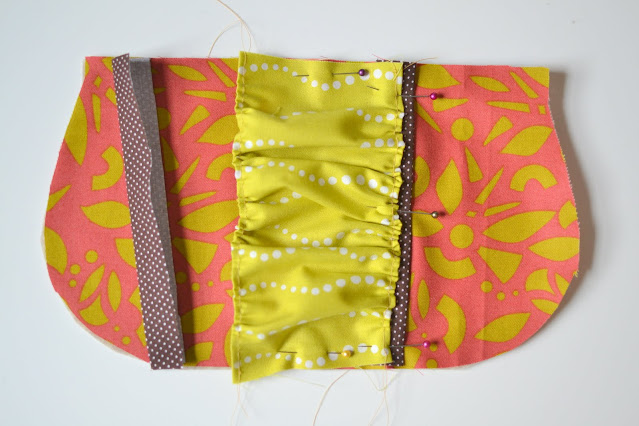
Pin each short edge to the center top and bottom of front exterior. Gather the fabric to the width of the clutch. Slip the accent strips just under the gathered edge and pin in place.
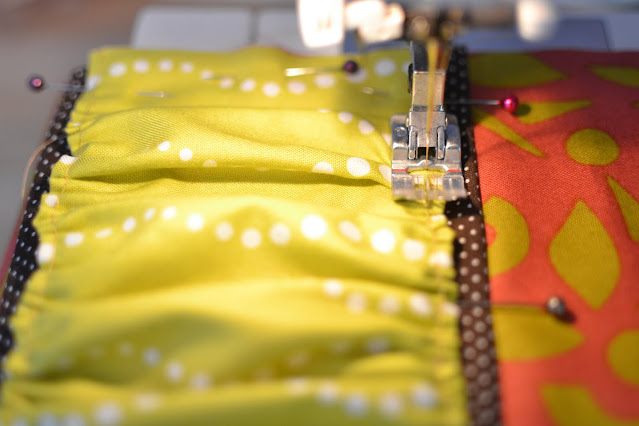
Topstitch the gathers, stitching just to one side of the gathering stitches. Pull out the gathering threads and set aside.

2. Prepare the strap
Take strap and fold long edges toward center of wrong side of fabric 1/2 inch on each side and press. Fold in half matching folded edges and press. Basically you are making a strip of double fold bias tape.
Topstitch about 1/8 inch away from each long edge. Fold finished strap in half and position it about 1 in down from the top on one of the exterior pieces, baste in place.

3. Prepare the Interior
Fold pocket piece in half lengthwise. Center pocket over the middle of the clutch interior, matching the pocket raw edge to the bottom, pin in place. Topstitch in two places to form pockets. Backstitch at the top of each pocket so it's nice and secure. I like to make my center pocket wide enough to slip a credit card into it. The small pockets on each side are great for lipgloss. Make it how you like it.
Turn piece over and trim the corners to match the exterior. Sew around the raw edges with a basting stitch.
4. Put in the zipper
Take one lining piece and lay it right side up. Center the zipper, teeth up, along the top of the lining piece (my zipper happens to be extra long). Position the zipper about 1/8 in from the top. Lay an exterior piece down on top with right side of fabric down. Make sure your exterior and interior pieces line up and pin in place. You created a little zipper sandwich.
Using a zipper foot, stitch 1/2 inch away from top edge. Use the zipper teeth as your guide.
Fold exterior and interior pieces back to expose zipper matching wrong sides together. Press and topstitch 1/8 in. away from seam. Repeat for the other side.
5. Finish the Clutch.
Unzip zipper at least halfway.
Match exterior and interior pieces right sides together and pin in place. Fold zipper toward the exterior side.
Starting at the bottom of the interior, sew around the clutch with a 1/2 in seam allowance on the interior pieces and a 1/4 inch seam allowance on the exterior. Leave a 3 inch opening in the bottom of the clutch. Clip curves and trim zipper.
Turn inside out through interior opening. Fold raw edges in and stitch interior opening closed.
And you are done!!
Press the outside so it looks nice and crisp. Now you have a pretty little clutch to give as a Christmas gift. If you like this tutorial, please follow me or friend me on facebook and Instagram @bluesusanmakes . I'd love to know if you make one too! Tag me and I'll see! #girlfriendlutch #bluesusanmakes
Oh, and if you are curious about this lovely fabric I used, it is from the Lucky Penny line by Allison Glass. I couldn't pass it up at the Quilt Market sample spree!
Happy sewing and Happy giving!
More handmade gifts to sew...


Sew cute!
ReplyDeleteyour clutch is sew cute, perfect for my teeny greatgranddaughter! thanx for the tute.
ReplyDeleteoh my gosh, this is so adorable! Can't wait to make a few. Thanks!!!
ReplyDeleteSo nice! Great tutorial. Thanks for sharing!
ReplyDeleteThat's really cute and your instructions are very clear. I'm teaching my daughter to sew and this contains some great new skills for her (easy zipper, gathering, sewing a gentle curve)!! Thanks for the tutorial.
ReplyDeleteI found this tutorial from the sew mama sew handmade holidays and I made it for my roommate! It turned out so cute and it was so easy to make! Thanks for the tutorial! You can see my version here: http://thecollegeseamstress.blogspot.com/2012/12/st-nicholas-day-surprise.html
ReplyDeleteVery cute thank you so much for giving me the use of the pattern to make for my guilty friends....they will love it. Each year we just make something small and give each other a notion..... appreciate it
ReplyDeletejust finish one and so happy with it...♥
ReplyDelete