Showing posts with label tutorial. Show all posts

Happy Easter Embroidery Free Pattern


Are you in the mood for a little stitching? Easter will be here before you know it! Sometimes it's fun to have a holiday project at your finger tips when you have a minute to stitch. I have a free Happy Easter embroidery pattern that you will want to check out.

"Bursting" Heart Pillow Tutorial: Valentine's Sewing Project

Bursting Heart Pillow Tutorial - scrap busting project for Valentine's Day

It's almost February! What?!!  Time to get ready for Valentine's day. Here is a fun pillow I made so I'd have something cute to set on my couch for Valentine's Day.  I  call it my "Bursting Heart" Pillow!  You can make one too!

DIY Valentine Heart Garland


One year I gathered some friends together for a Sew Day at my house and we each made a cute Heart Garland for Valentine's day. It's easy to make and very beginner friendly. Maybe you want to gather your friends together for a Sew Day and make a Valentine Heart Garland too... 

Pixelated Heart Quilt: Whole Quilt Chain Piecing Technique

Pin this! - Whole Quilt Chain Piecing - Pixelated Heart Mini Quilt

I always ooh and aaahh at all the Pixel Heart Quilts that pop up around this time of year. I'm so happy I finally made one of my own because it was FUN! I figured out a way to chain piece it so all those little squares would stay in order without me having to think about it as I sew. Today I'm going to show you how I did it! 

Heart Zipper Pouch with Ruffles: Free Sewing Pattern

Do you know of anyone who needs a little extra love this Valentines Day?  Here's a pretty zipper pouch you can make to take to your favorite 'Galentine'! Fill it with a few chocolates and you have a heart felt gift! 

Easy Paper Bunting Tutorial: Outdoor Wedding Decor

 This post may contain affiliate links


A few years ago I hosted a Wedding Open House at the end of summer for some dear friends. It was thrown together a bit at the last minute so I needed some simple decor that would make a statement. A White Paper Bunting was the perfect solution. Let me teach you how to make one!

Scout Book Hanging Pocket Tutorial

Scout Book Hanging Pocket Tutorial - Blue Susan Makes

One of the things I love about having my sewing machine sitting at the ready is that I can quickly sew things for my family and my home as the need arises. This week I used my sewing skills to solve a little organization dilemma, and whipped up a little book pocket for my son's scout book. It has been the perfect solution for busy nights. I'll show you how to make one too!

Soccer Mom Series: Waterproof Blanket Tutorial

Soccer Mom Series: Waterproof Blanket Tutorial
Hi everyone!  Have you ever sat down on grass that you thought was dry only to feel water seeping through your pants after you've sat there for a minute?  No fun!  Well today I'm sharing a little blanket you can make to sit on so that will never happen again!  

How to Sew a Prom Dress - Simplicity 8289


Hello sewing friends!  Prom season is upon us again and it's time to start thinking about what pattern to choose if you are making a dress. I thought it would be fun to share the prom dress I made for my daughter a few of years ago. I've been sitting on this post for a while but I'll just post the following as it was written when it was fresh...

Teach a Sewing Class: Super Simple Tote


Today I'm sharing the Super Simple Tote that I taught at our Sewing Soiree last week.  It is very basic and great for beginners.   In fact, it is so easy, I think it is the perfect project to use to teach someone to sew.

 I think it is so fun to teach others to sew.  Sewing is such a useful skill, plus it's fun! I've put together a set of instructions for you to use to teach your own sewing class.  Teaching a class is a great way to spread the sewing love and share your passion with your friends.  This tote is by no means my own design.  I basically copied a simple store bought tote that I liked.  I particularly like that the bag has a gusset that is sewn into the side seams.  It makes such a cute little triangle, and is way easier than sewing a corner into the bag after you sew the side seams as you would for a traditional gusset. 

I also like the way the handles are attached.  You don't have to be careful about hiding any raw edges as you sew. 
  
Have I sold you on the simplicity of this project yet??

I made a word document with all of the instructions that you may print out to share if you are teaching a class. Click HERE to get to it. This bag is made of one layer of fabric so you will want to choose a heavier weight fabric for it.  Canvas, outdoor canvas, twill, decorator fabric, corduroy, or denim are all good choices.   You will need 1/2 yard of fabric.


 Lets get started, shall we?

1. Cut fabric. :
for body - cut a 14” x 32” rectangle
for handles - cut 2, 3” x 21” rectangles


2. Prepare handles by pressing long sides ½ in toward center with wrong side
of fabric facing up.  Then match folded edges and press in half forming a strap. Stitch along both sides 1/8 inch from edge.  At this point lay the handles next to each other and make sure they are still the same length.


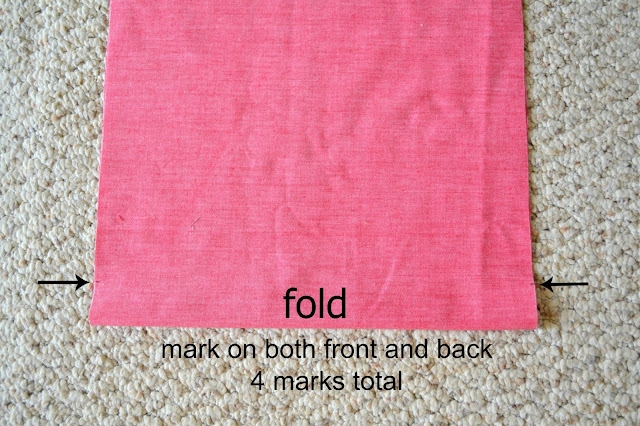
3. Prepare the body of the bag by folding the rectangle in half with right sides
together. Make a small mark 1 ½” from fold on both edges front and back.

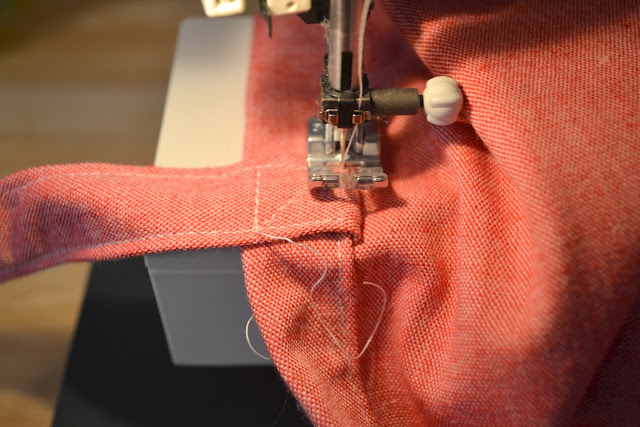
4. Make a fold connecting each of the markings and match folds together
making a pleat that folds up inside the bottom of the bag. Pin pleat at the

sides. See example.


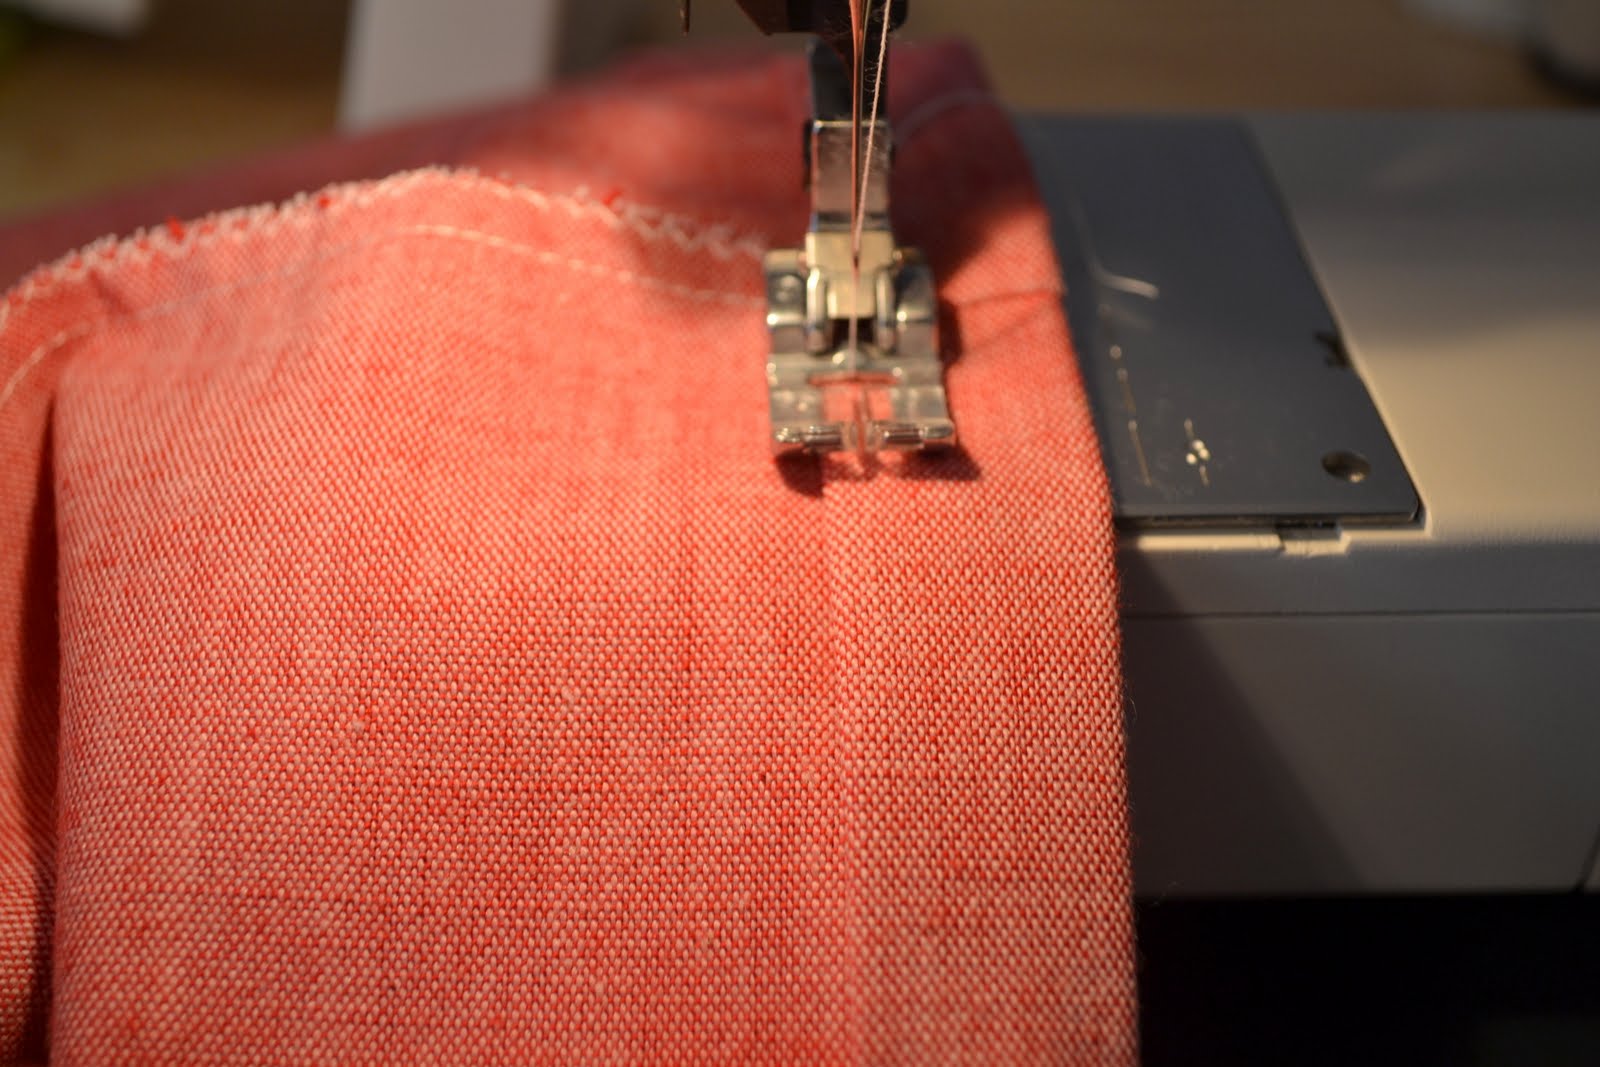
5. Sew side seams by stitching along each side about 3/8 in. from edge. Using a wide
zig zag stitch, sew along side seam enclosing the raw edges so they won’t
fray.


6. Fold down the top of the bag ½” toward wrong side of fabric and press
pushing side seams to ones side.  Then fold it down again 1” and press.


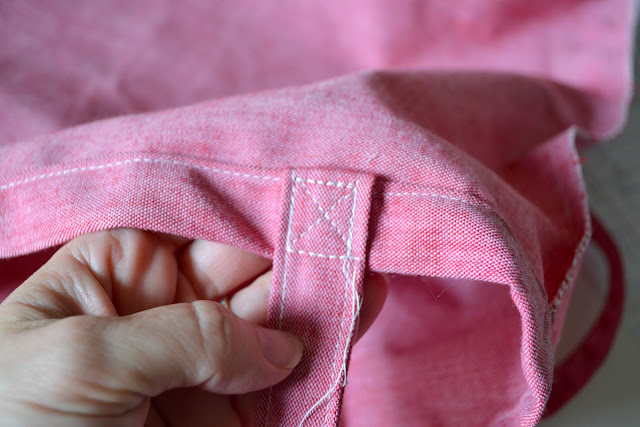
7. Tuck handle end into fold 3 inches from each side seam and pin. Handle
should point down into bag. Repeat for the other handle.

8. Starting at a side seam, topstitch down fold 1/8 inch from bottom of fold on
the inside of the bag.


9. Finally fold up handle and stitch in place making an “x” surrounded by a box.
10. Now, for a perfect looking bag, iron it.

Okay, so here is a little more information.  You can also line this bag easily by cutting a second body out of lightweight fabric that is 3 inches shorter than the main body cut.  You make it exactly the same way and slip it inside just before you hem the top. 

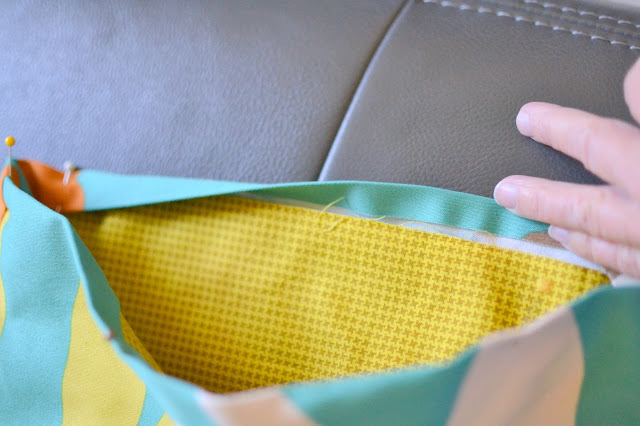
You can also add a pocket to the inside lining before you sew it together.


Now go spread the sewing love and teach someone to sew!